Deploy Smart Contracts to a real Network

So far we have worked with Ganache, which is two things in one:
- It is a wallet, which can do signTransaction
- It is a blockchain, at least a simulation of one, good enough to test Smart Contract behavior.
How do we go about deploying the contract to a real blockchain? Do we need to copy it back to Remix? Of course not...
Broadly speaking, there are two ways to do that:
- Use Truffle to sign Transactions and connect to a blockchain node, either self-hosted or hosted. This way we need to either give Truffle a private key or the seed phrase. And you will need to download and run a node or need to sign up to a service like Infura, Alchemy or Pocket Network - there are many more.
- Use Truffle Dashboard and connect MetaMask
We start with the first and use Infura to deploy the Smart Contract. It's unfortunately still the standard among a lot of different frameworks out there. Then we'll see how Truffle Dashboard is improving this.
Deploy using Truffle, hdwallet-provider and Infura
In order for us to get access to a blockchain node, we have two options:
- Install a consensus Node, like Lighthouse or Nimbus, and an execution Node, like Geth or Besu, let it sync in the blockchain and let Truffle connect to the node locally, very much like we do it with Ganache. This requires, as per the ethereum.org website, at the very minimum: CPU with 2+ cores, 8 GB RAM, 700GB free disk space (SSD!), 10+ MBit/s bandwidth. This is unsuitable for our course and exceeds what I could show you here. But, if you want absolute control of your nodes, then this is the way to go.
- We sign up with a service that hosts these nodes and get access. They are the middle man, although the can't change any transaction information that are signed with our private key, but they can deliberately delay transactions or slow down the API.
Signing Transactions using HDWallet-Provider
The first thing we need to do is instruct Truffle to sign a transaction before sending it. This is best done with a small npm module called HDWallet-Provider.
We install it by simply typing:
npm install @truffle/hdwallet-provider
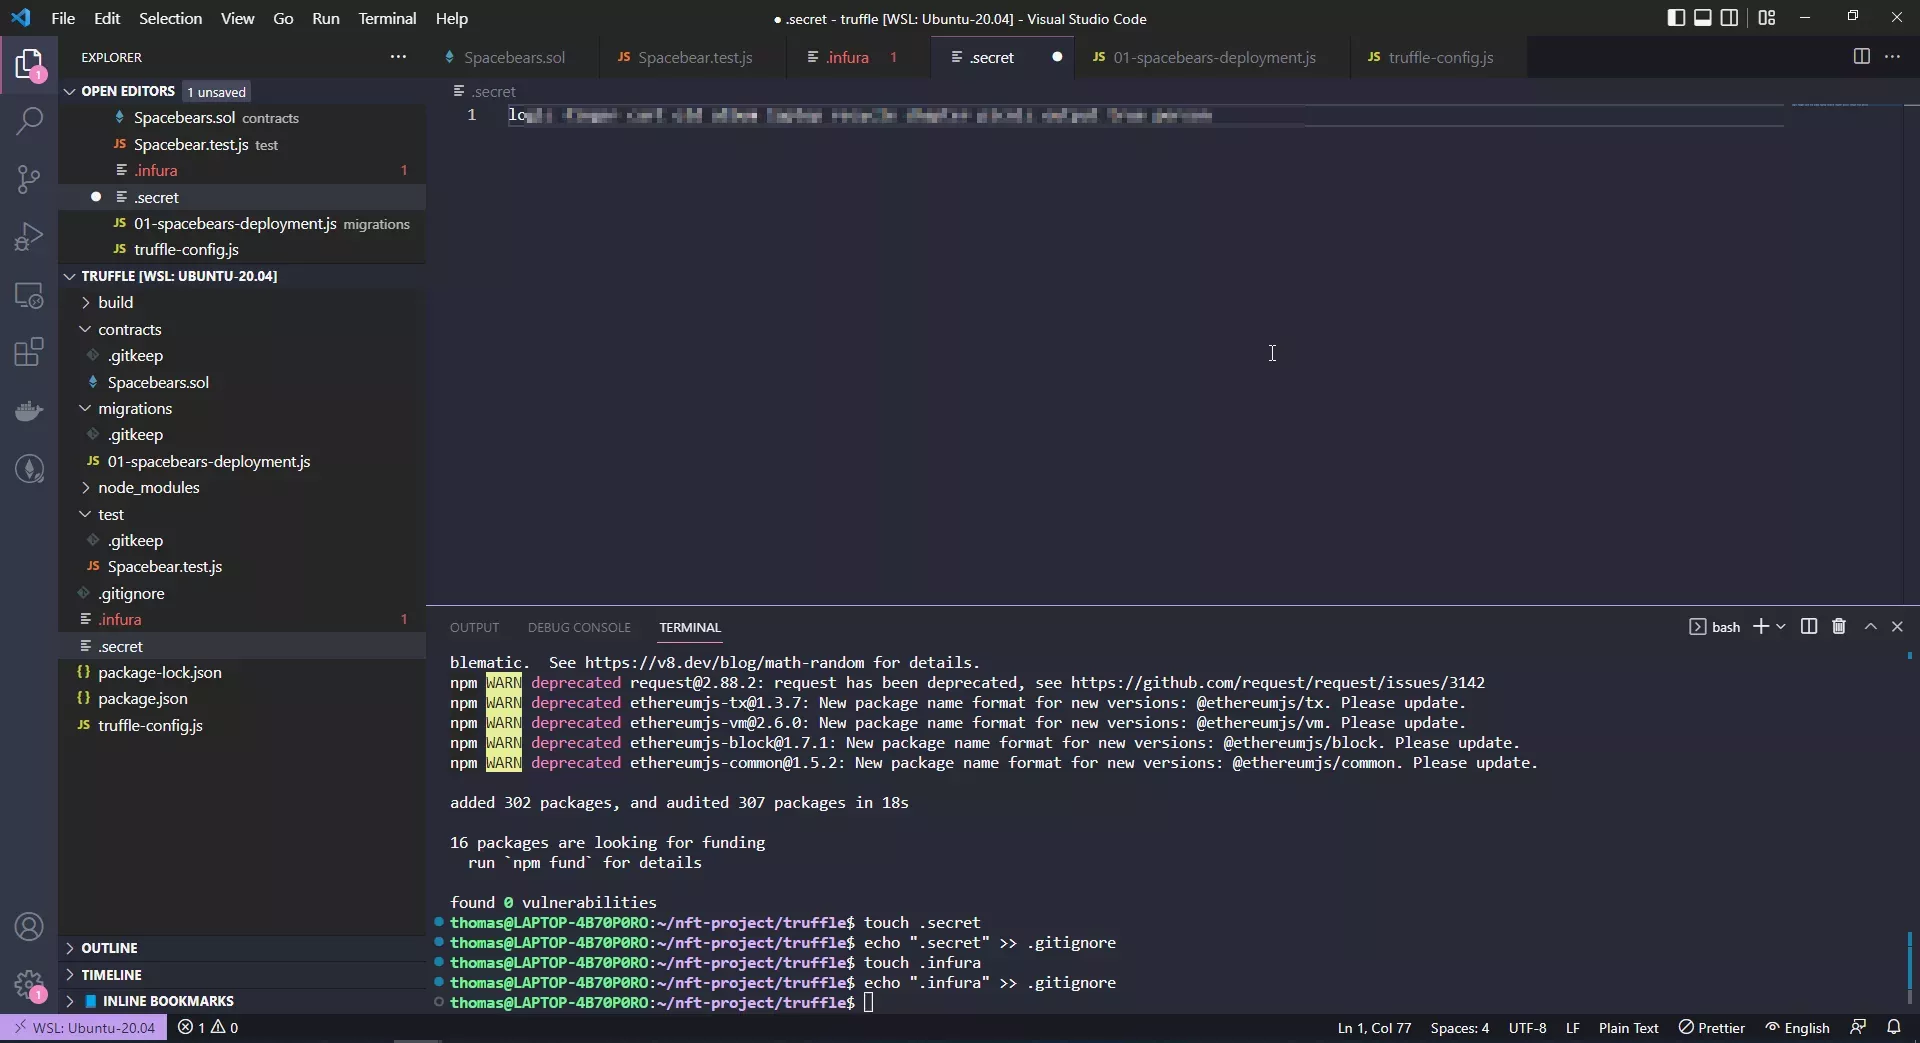
touch .secret
echo ".secret" >> .gitignore
touch .infura
echo ".infura" >> .gitignore
The second part will create a new file called .secret and add it to a potentially already existing .gitignore file. If you are not using git and you don't know what that is, I can wholeheartedly recommend a simple tutorial about git and start using it for your source control. This is beyond the scope of this course.
and inside the truffle-config.js file you need to make a few changes:
const HDWalletProvider = require("@truffle/hdwallet-provider");
const fs = require('fs');
const mnemonicPhrase = fs.readFileSync(".secret").toString().trim();
const infuraProjectID = fs.readFileSync(".infura").toString().trim();
//...more code
Why not store the Mnemonic in the .env?
A question that I was asking myself and got asked a few times: Why not use dotenv and store the mnemonic in the .env file?
That's a good question, and the answer is relatively simple: Later on, when you mix in react, it can happen, that react will bake the content of the .env into the built output. That would be fatal.
My recommendation is therefore to put the mnemonic completely separate.
The second part is using the HDWalletProvider in your network configuration. Depending to which Test-Network you connect to, you need to adjust the naming accordingly. I'm connecting to Görli here:
    networks: {
        //ganache: ...
        goerli: {
            // must be a thunk, otherwise truffle commands may hang in CI
            provider: () =>
                new HDWalletProvider({
                mnemonic: {
                    phrase: mnemonicPhrase
                },
                providerOrUrl: "https://goerli.infura.io/v3/" + infuraProjectID
                }),
            network_id: '5',
            },
        //...
The question is now, where is the infuraProjectID in the .infura file coming from and what goes into the .secrets?
Signup with Infura
Infura, just one example, offers a certain amount of free requests to their hosted blockchain nodes. All you need is an email address. So far, they have been quite professional in their offering, being a subsidy of ConsenSys, mostly having Enterprise Customers. I have also used Pocket Network because they offer a decentralized way to access nodes, but had a few troubles along the way.
First step is to sign up with infura. Just go to https://infura.io and sign up.
Once you are on the dashboard, you need to create a new project.

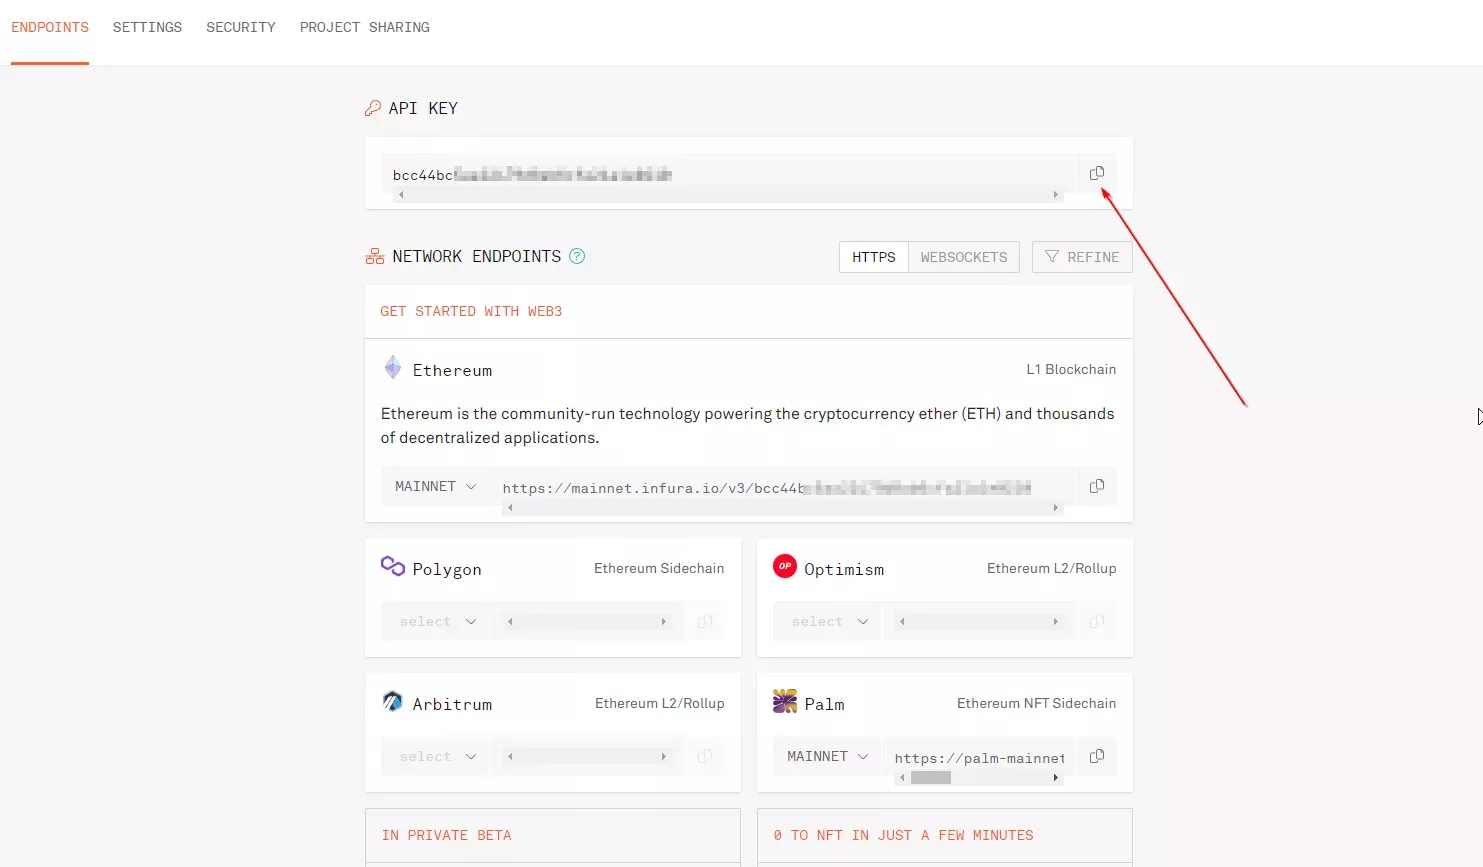
And then select Web3 API and give it a name, for example "Truffle Deploy"

Then copy the API Key and paste it into your .truffle file.

Once that's done we need a seed phrase.
Getting the Mnemonic Seed Phrase
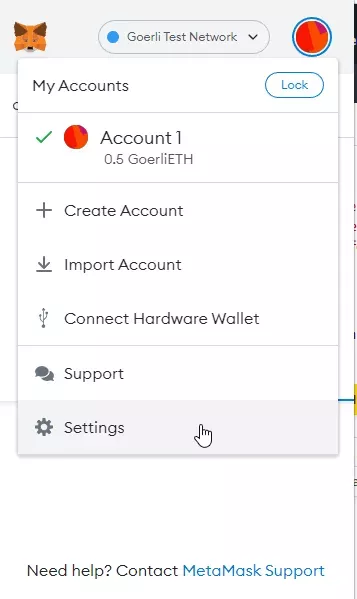
Where do you get the Seed phrase from? From MetaMask, for example.
Remember, the seed phrase is like the "Master Key" that creates private keys and then from there public keys. If you use the same seed for MetaMask and Truffle, you use the same accounts ultimately.
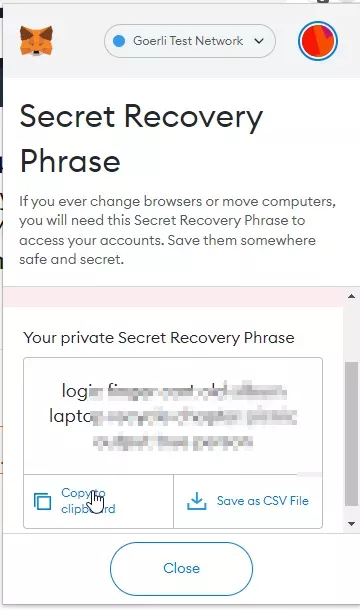
Settings -> Security and Privacy -> Reveal Secret Recovery Phrase
Enter your password and copy the phrase into the ".secret" file
Running Migrations
From here we have two options:
- Start the console to migrate and interact with smart contracts
- or just type in
truffle migrate --network goerli
Let's start the console to see if the accounts match up:
truffle console --network goerli
The simply run
accounts
These accounts should be the same as the ones in MetaMask:

Let's run the migration:
migrate
As this is a real network, you'll see that Truffle first simulates the complete deployment and then runs actual transactions. This is just a precautionary measure and can be deactivated if necessary.
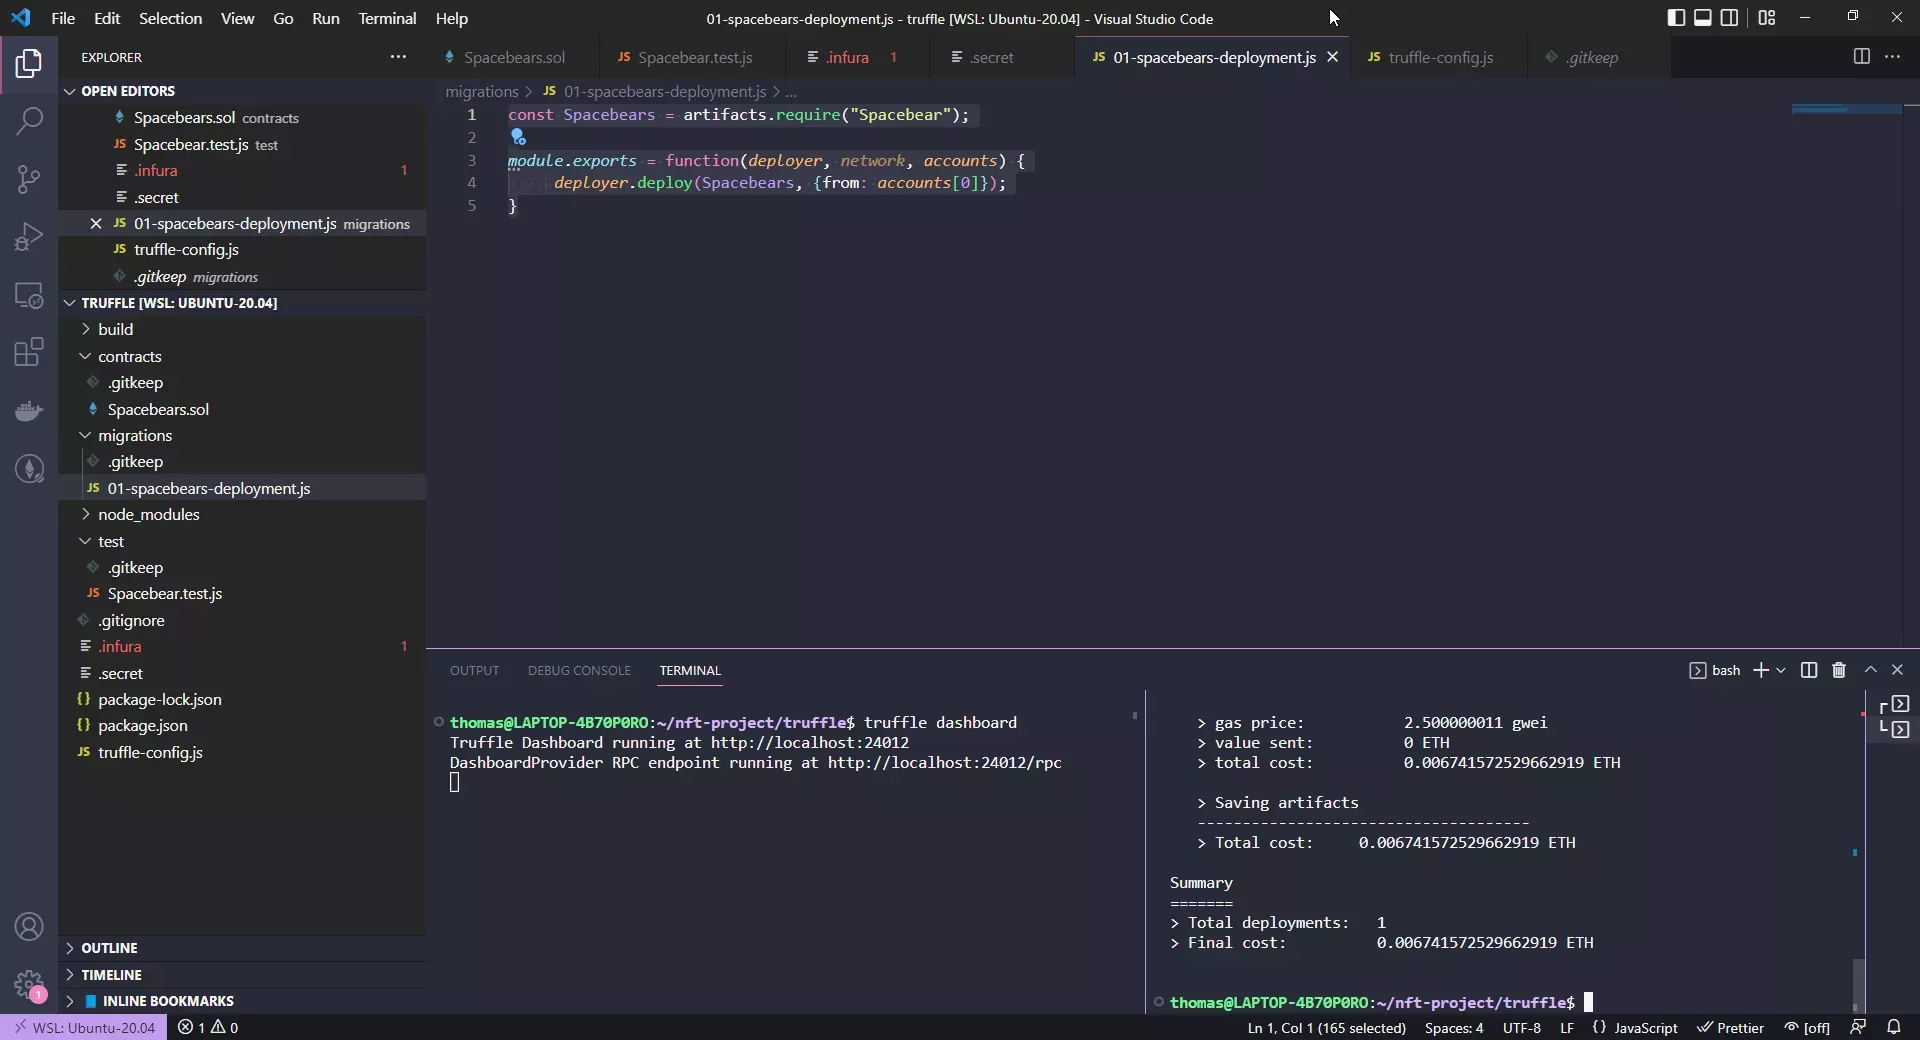
At the end, you'll probably see that the contracts are successfully deployed:

You could then interact with the contracts again, mint tokens etc.
Before we are verifying our contracts on Etherscan, let's check out the other method to deploy smart contracts. Because this method requires two things which are annoying and highly insecure: First getting an endpoint, secondly copying around a seed phrase. Maybe we can get rid of both...
Smart Contract Deployment using Truffle Dashboard
There is a relatively new feature that lets you use MetaMask to do the actual interaction with a blockchain. It's in there for a while, but not used very widely.
It's called Truffle Dashboard. The idea is to let truffle connect to MetaMask directly.
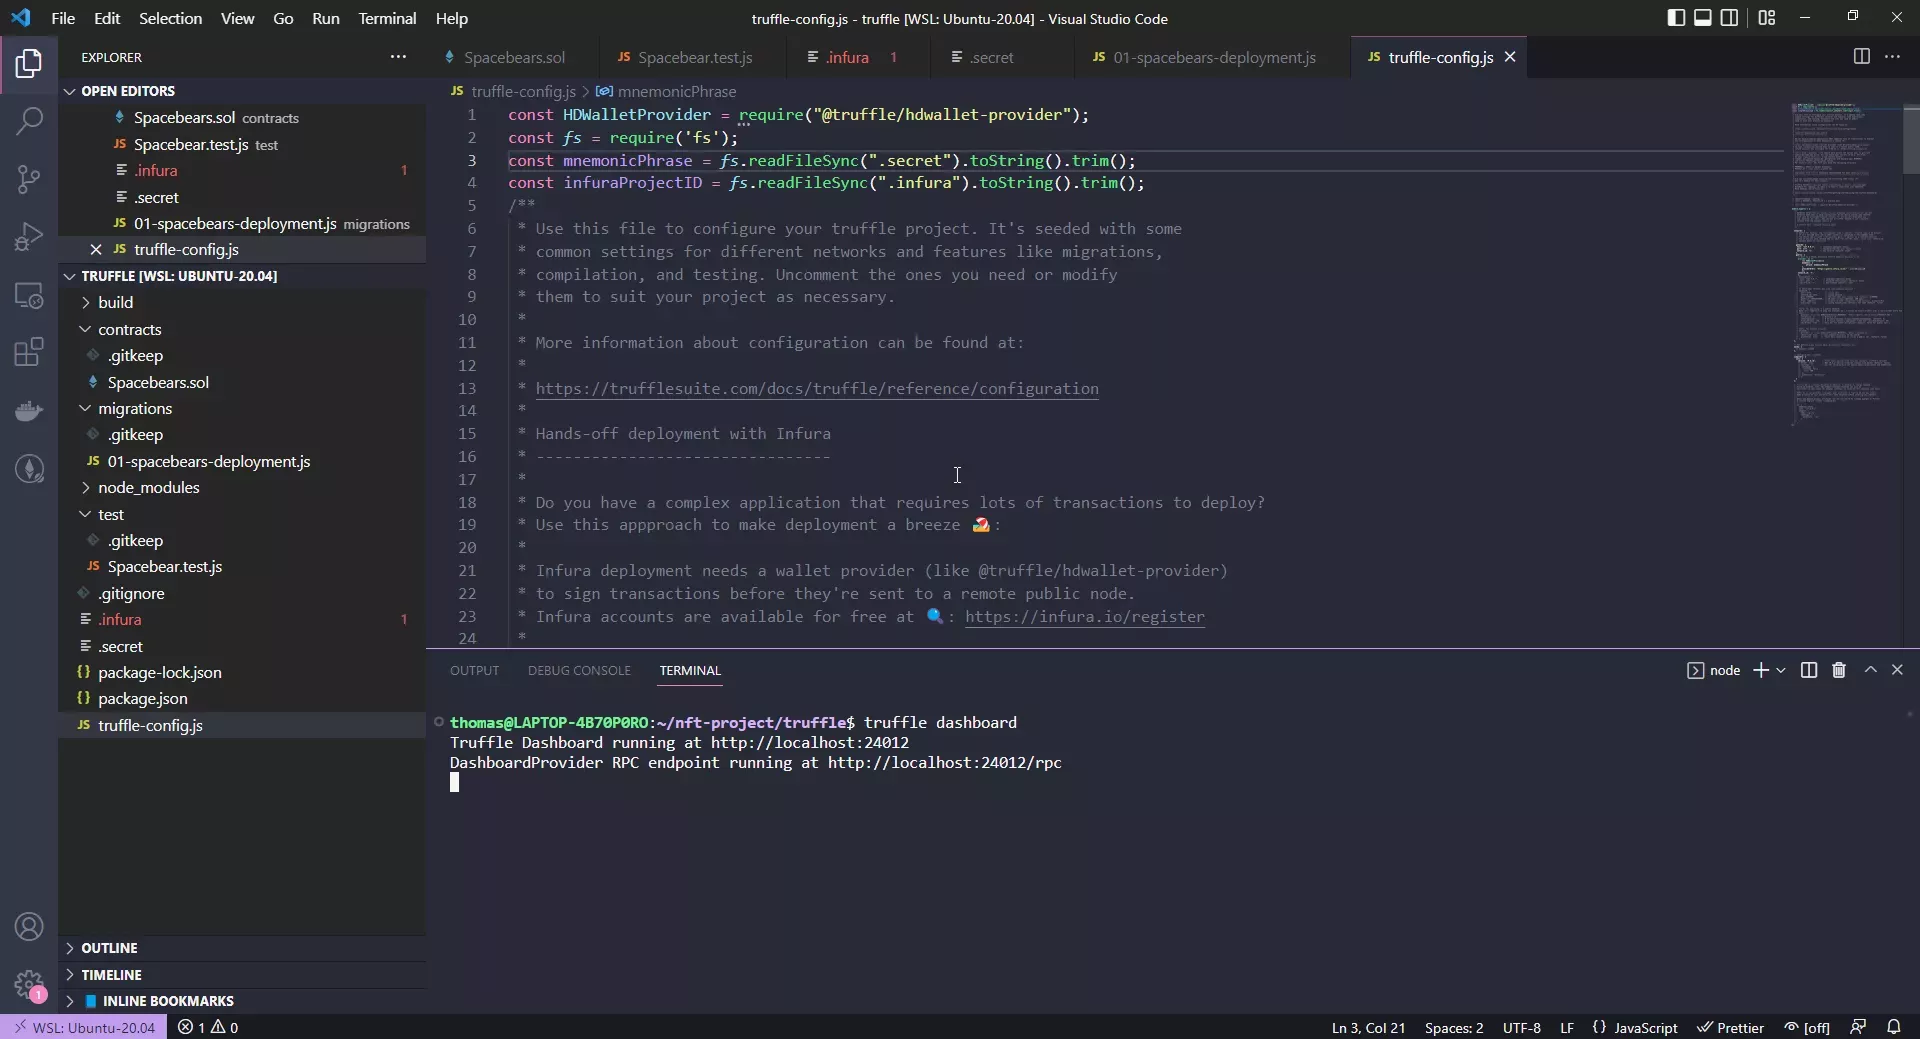
Start it on one terminal with
truffle dashboard
which will open an RPC tunnel to a website where MetaMask can connect to
Then you can connect to it from MetaMask:
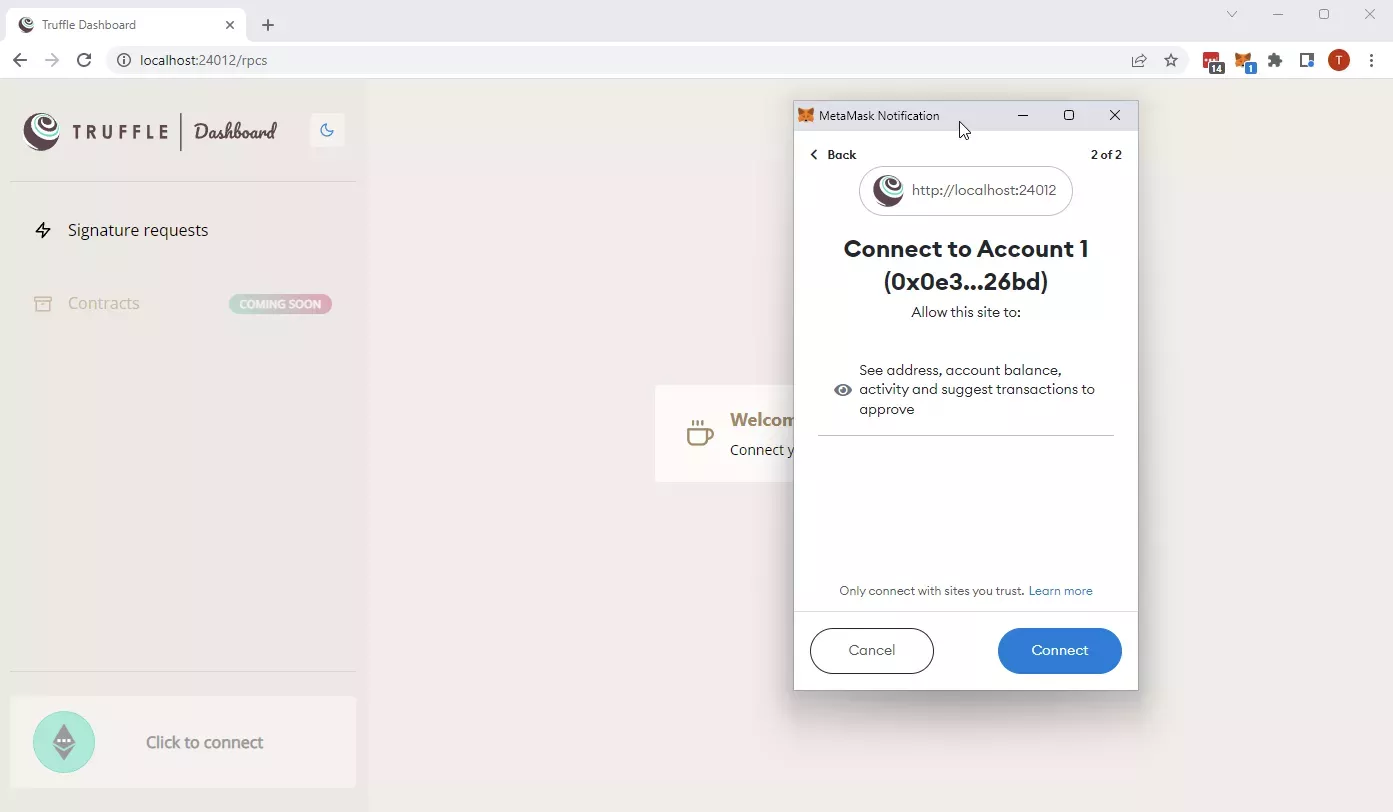
Once connected you can use it like a defined network, without it being defined in the truffle-config.js file:
Open a second terminal and type in
truffle migrate --network dashboard
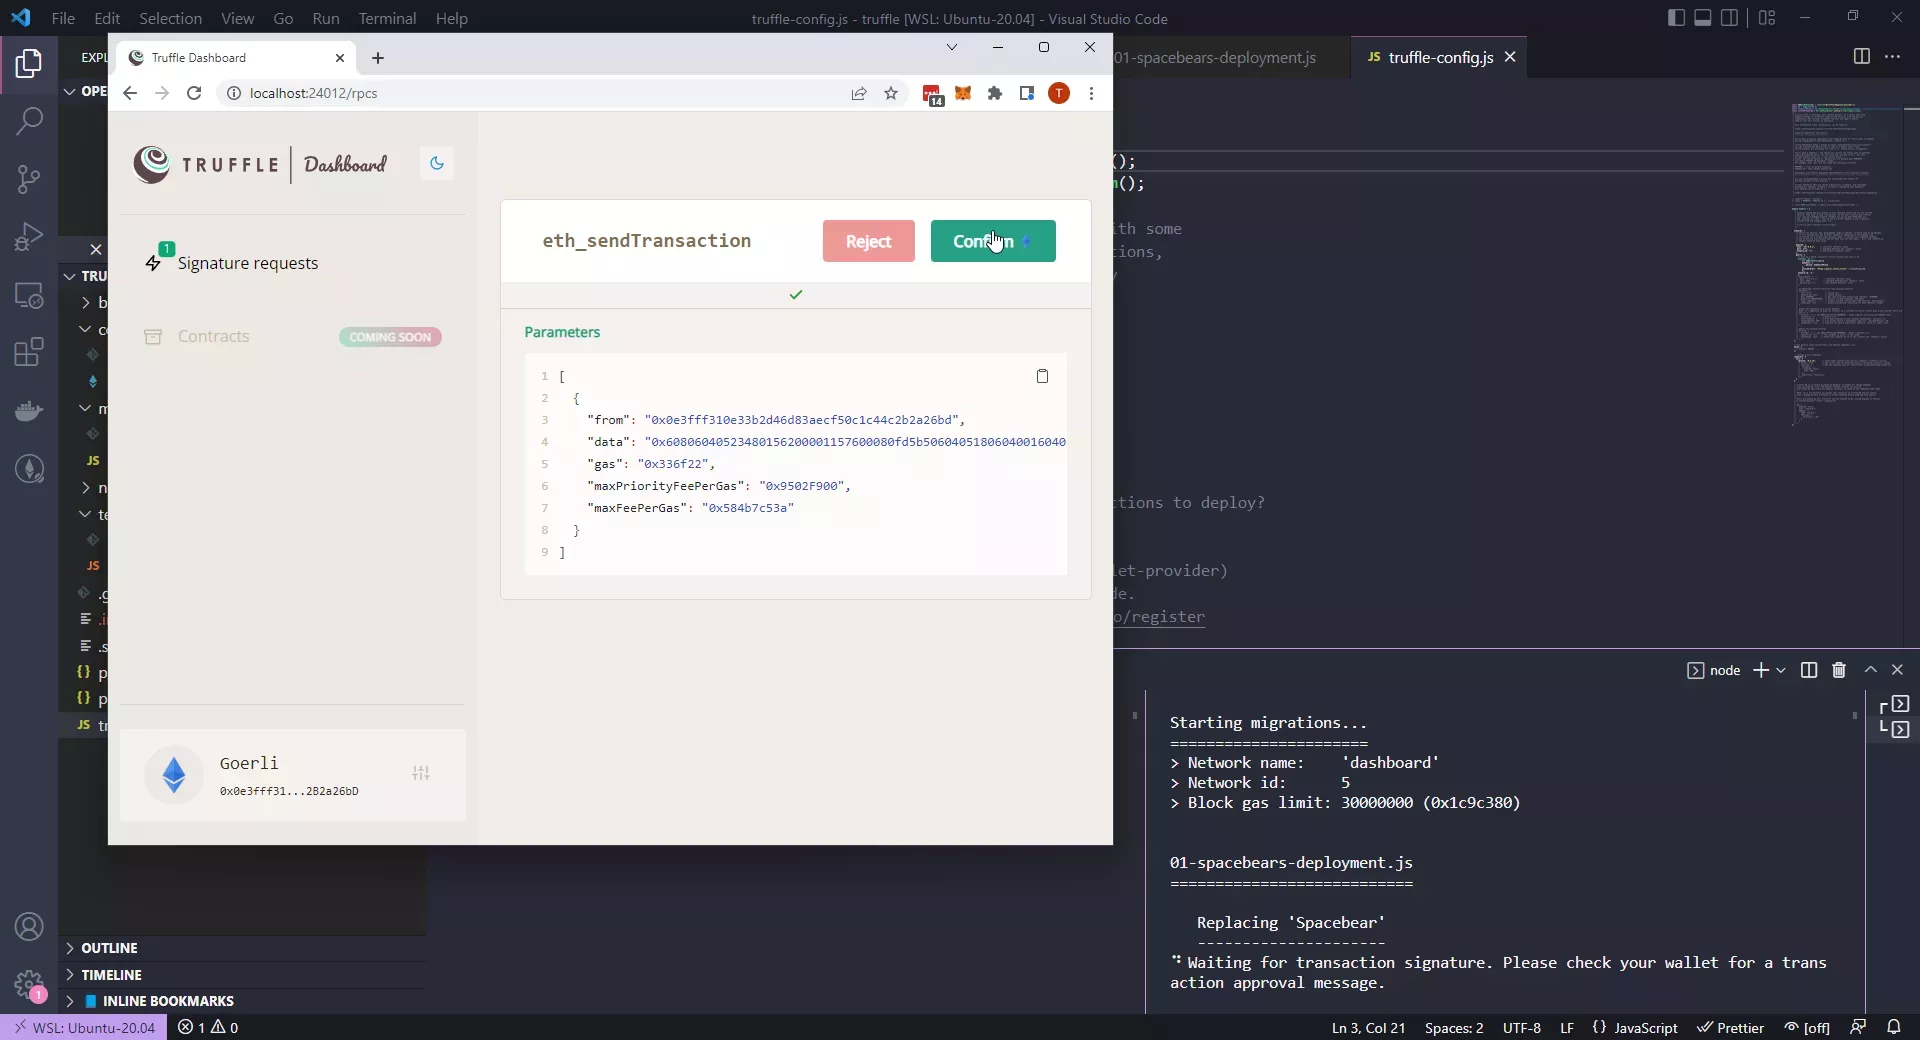
It will trigger a new Transaction in the Dashboard website which you need to confirm with MetaMask.
Now, mind the difference: You don't need to copy any seed phrase, you don't need to have any Infura endpoint (or any other hosted node). It just works™️. Why did we do the long way before we do the shortcut? Because in Hardhat and Foundry you need to use the seed-phrase method. And in the wild you'll discover a bazillionmillion (actual number, I think 🤔) truffle projects and tutorials which are using the old method.
!!! info Cannot read property 'from' of null
If that happens, you need to add the sender address to the migrations file 01-spacebears-deployment.js:
```js
const Spacebears = artifacts.require("Spacebear");
module.exports = function(deployer, network, accounts) { deployer.deploy(Spacebears, {from: accounts[0]}); } ```
Smart Contract Source Code Verification on Etherscan
To verify the source code with Truffle, there's a plugin: truffle-plugin-verify.
Install it with
npm install -D truffle-plugin-verify
Add it to the plugins section of the truffle-config.js file:
module.exports = {
  /* ... rest of truffle-config */

  plugins: ['truffle-plugin-verify']
}
Then login to your etherscan account and copy the API key. If you use dotenv, fine, if not and you follow in this tutorial, create a new .etherscan file, add it to .gitignore and paste the key there:
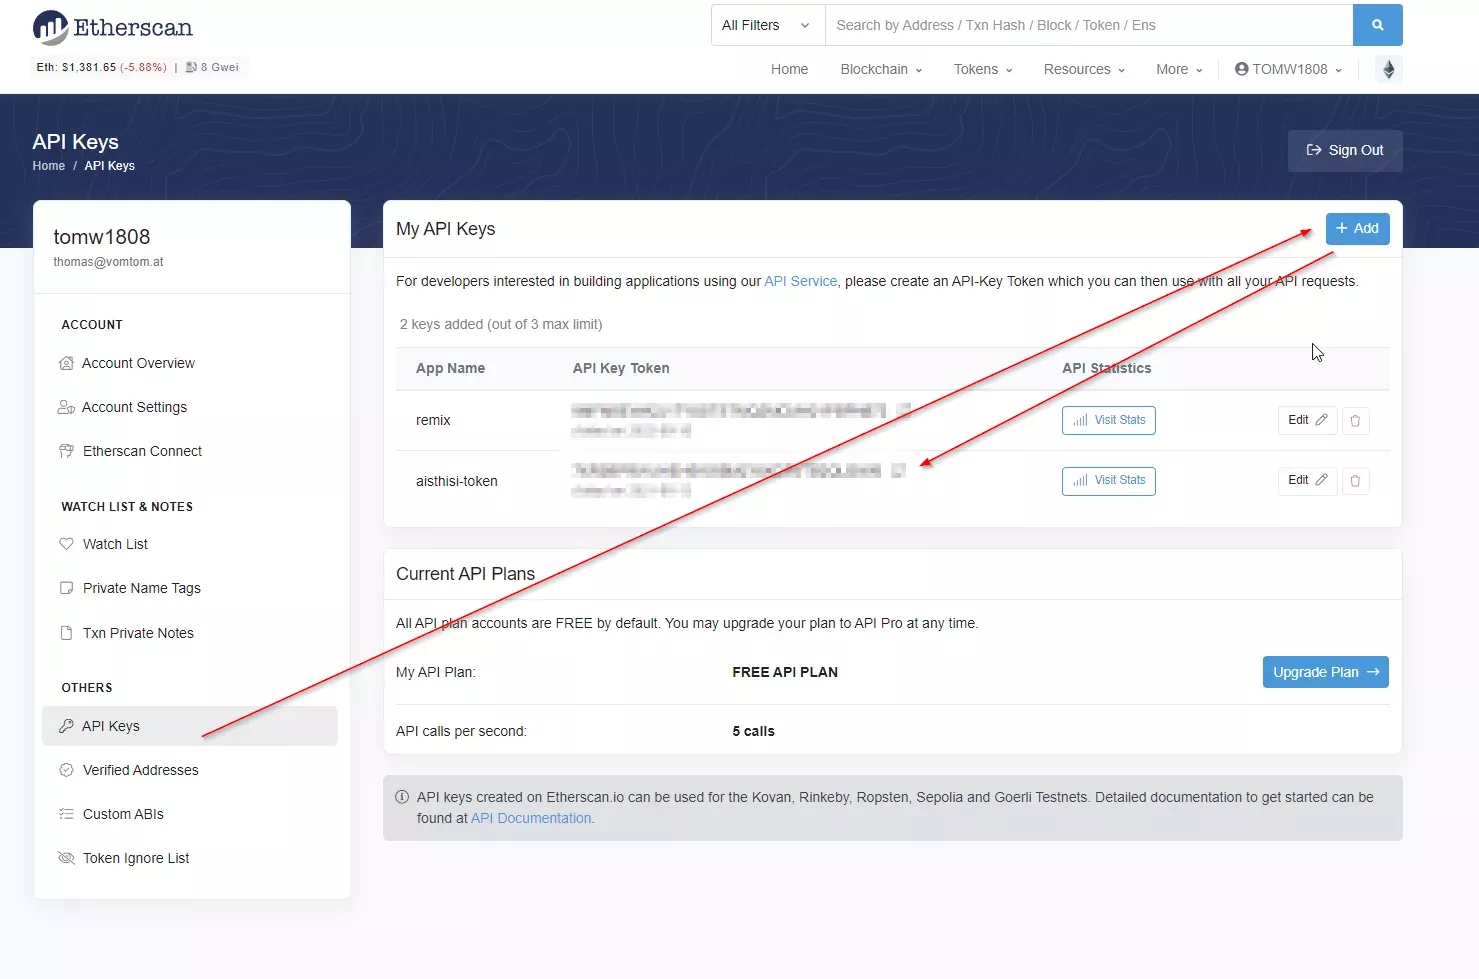
touch .etherscan
echo ".etherscan" >> .gitignore
paste the key to .etherscan.
Then you could use it like this:
module.exports = {
  /* ... rest of truffle-config */

  plugins: ['truffle-plugin-verify'],
  api_keys: {
    etherscan: fs.readFileSync('.etherscan').toString().trim()
  }
}
Then open a shell and simply verify the contract (with infura its network goerli, with the open dashboard its network "dashboard"):
truffle run verify Spacebear --network goerli
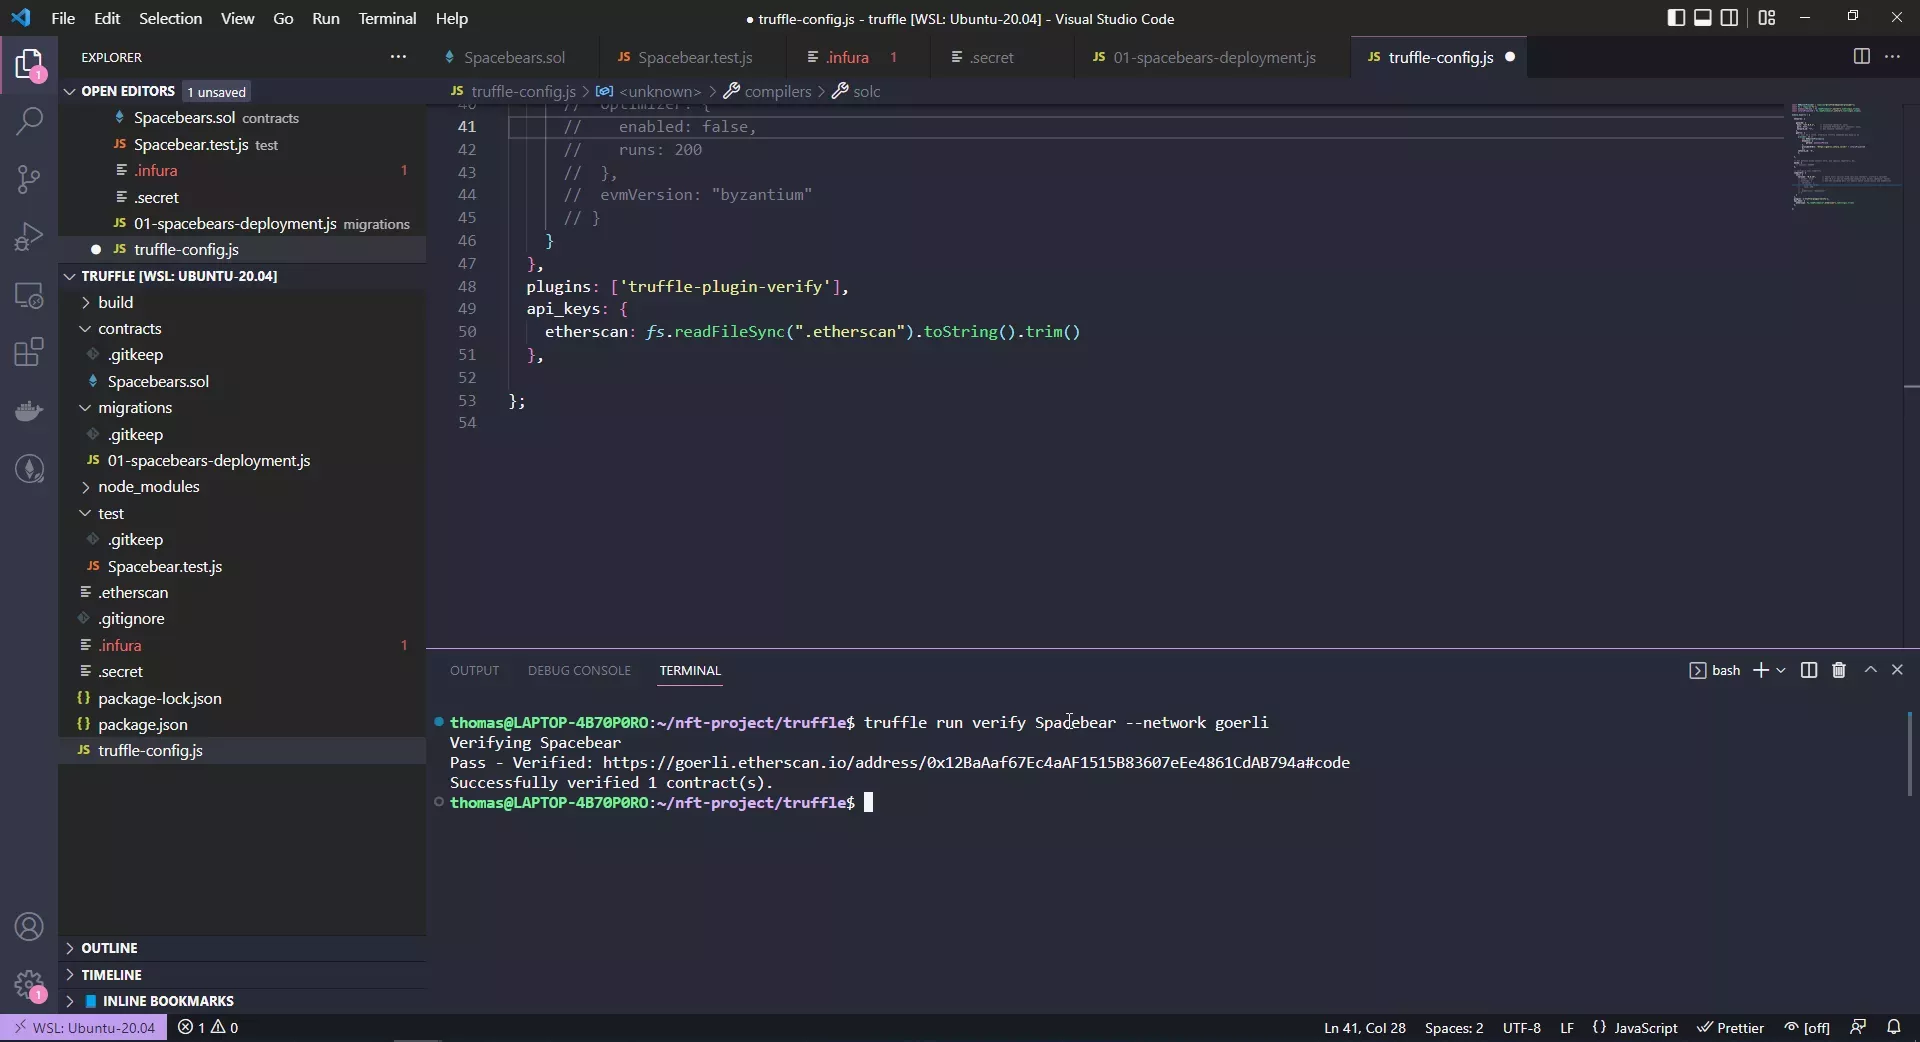
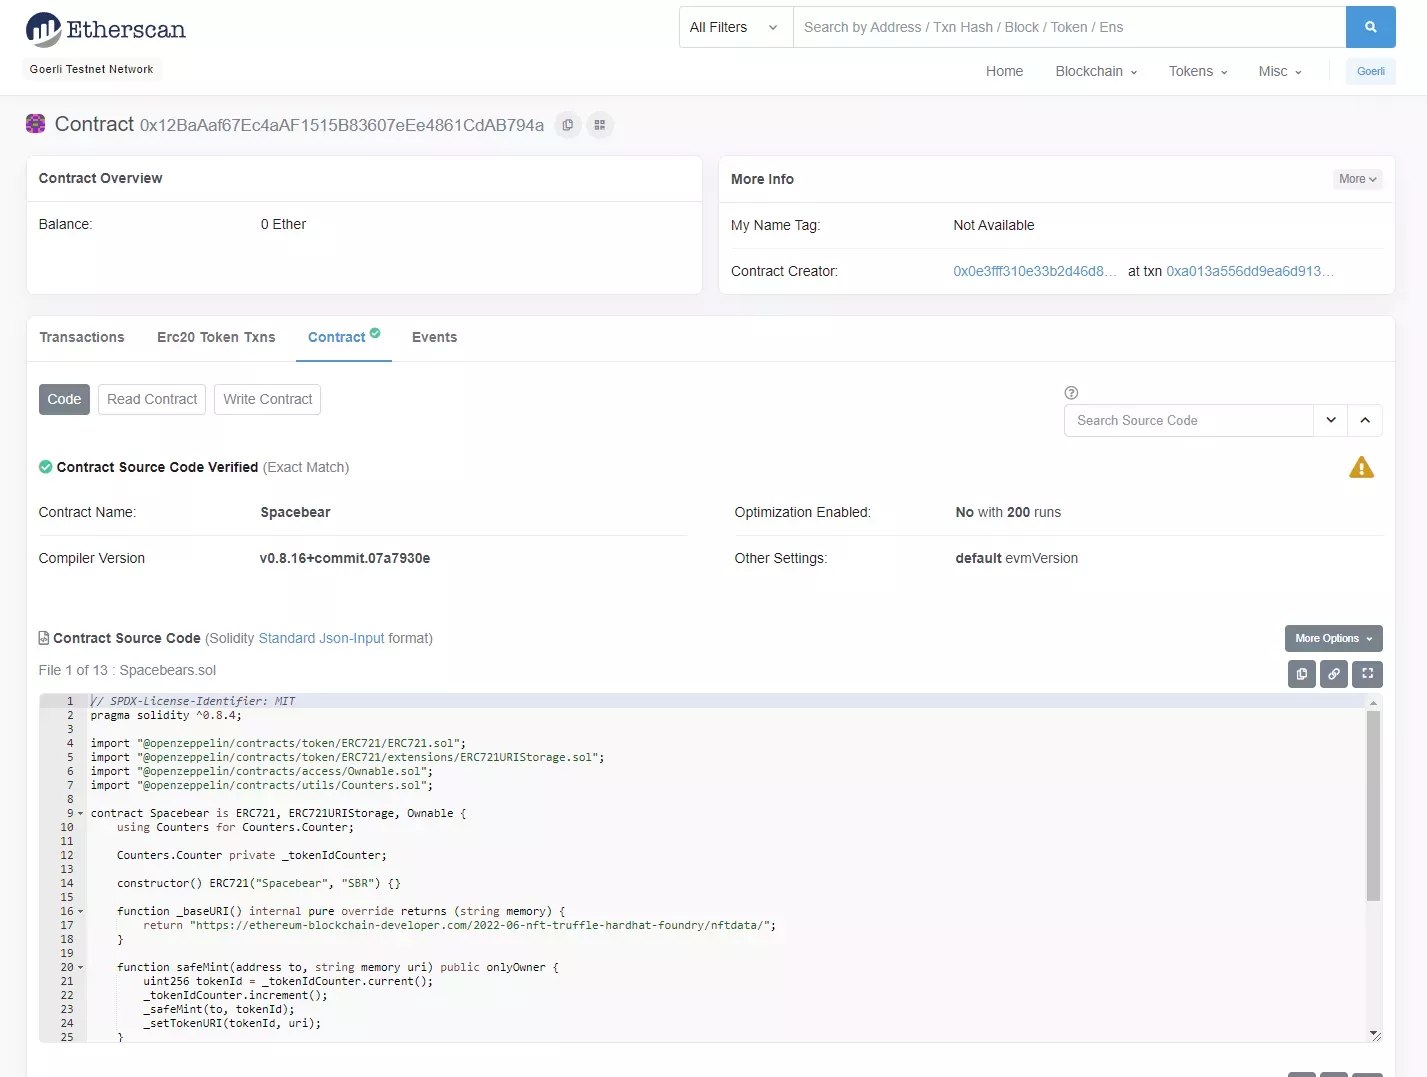
Then the little contracts section should have the little green checkmark added:
Solidity Optimizer
The last setting I want to quickly touch on is the optimizer. There is a fairly long article about this on the Solidity Documentation.
In general, the optimizer tries to simplify complicated code, which reduces the gas needed for contract deployment as well as for external calls made to the contract.
Therefore its almost always a good idea to turn on the optimizer:
module.exports = {
    //...
     compilers: {
    solc: {
      version: "0.8.16",      // Fetch exact version from solc-bin (default: truffle's version)
      // docker: true,        // Use "0.5.1" you've installed locally with docker (default: false)
      settings: {          // See the solidity docs for advice about optimization and evmVersion
       optimizer: {
        enabled: false,
        runs: 200
      },
      //  evmVersion: "byzantium"
      // }
    }
  },
}
Final truffle-config.js
This is my final truffle-config.js file, for comparison:
const HDWalletProvider = require("@truffle/hdwallet-provider");
const fs = require('fs');
const mnemonicPhrase = fs.readFileSync(".secret").toString().trim();
const infuraProjectID = fs.readFileSync(".infura").toString().trim();

module.exports = {

  networks: {

    ganache: {
     host: "127.0.0.1",     // Localhost (default: none)
     port: 8545,            // Standard Ethereum port (default: none)
     network_id: "*",       // Any network (default: none)
    },
    goerli: {
      // must be a thunk, otherwise truffle commands may hang in CI
      provider: () =>
          new HDWalletProvider({
          mnemonic: {
              phrase: mnemonicPhrase
          },
          providerOrUrl: "https://goerli.infura.io/v3/" + infuraProjectID
          }),
      network_id: '5',
      },

  },

  // Set default mocha options here, use special reporters, etc.
  mocha: {
    // timeout: 100000
  },

  // Configure your compilers
  compilers: {
    solc: {
      version: "0.8.16",      // Fetch exact version from solc-bin (default: truffle's version)
      // docker: true,        // Use "0.5.1" you've installed locally with docker (default: false)
      settings: {          // See the solidity docs for advice about optimization and evmVersion
       optimizer: {
         enabled: false,
         runs: 200
       },
      //  evmVersion: "byzantium"
      }
    }
  },
  plugins: ['truffle-plugin-verify'],
  api_keys: {
    etherscan: fs.readFileSync(".etherscan").toString().trim()
  },

};
And if you are solely working with Truffle Dashboard, you can even skip the goerli network:
module.exports = {

  networks: {

    ganache: {
     host: "127.0.0.1",     // Localhost (default: none)
     port: 8545,            // Standard Ethereum port (default: none)
     network_id: "*",       // Any network (default: none)
    },
  },

  // Set default mocha options here, use special reporters, etc.
  mocha: {
    // timeout: 100000
  },

  // Configure your compilers
  compilers: {
    solc: {
      version: "0.8.16",      // Fetch exact version from solc-bin (default: truffle's version)
      // docker: true,        // Use "0.5.1" you've installed locally with docker (default: false)
      settings: {          // See the solidity docs for advice about optimization and evmVersion
       optimizer: {
         enabled: false,
         runs: 200
       },
      //  evmVersion: "byzantium"
      }
    }
  },
  plugins: ['truffle-plugin-verify'],
  api_keys: {
    etherscan: fs.readFileSync(".etherscan").toString().trim()
  },

};