Buy Coffee Tokens
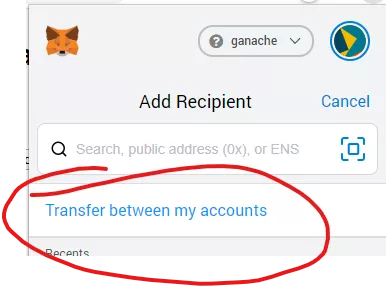
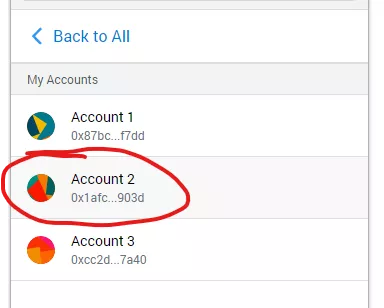
To actually purchase any tokens, we must first get some ether into the account. Every token has a price, so, let's first send Ether from Account #1 to Account #2:
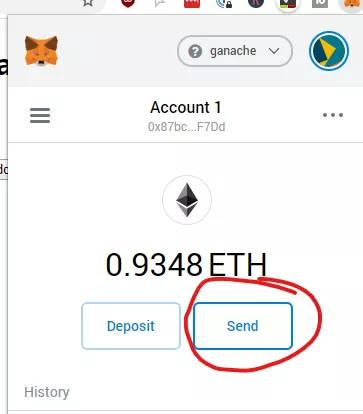
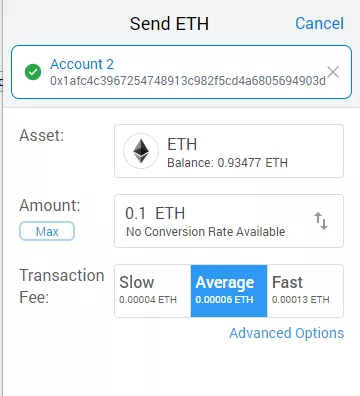
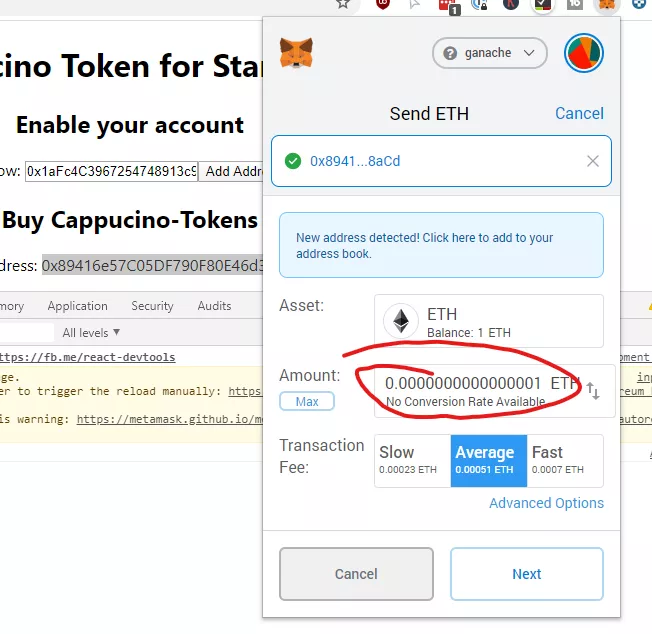
Enter 0.1 Ether, Hit confirm and wait for the 0.1 to arrive in Account#2. Using Ganache, it should take no longer than 5 seconds.
Now the interesting part. How to get Tokens?
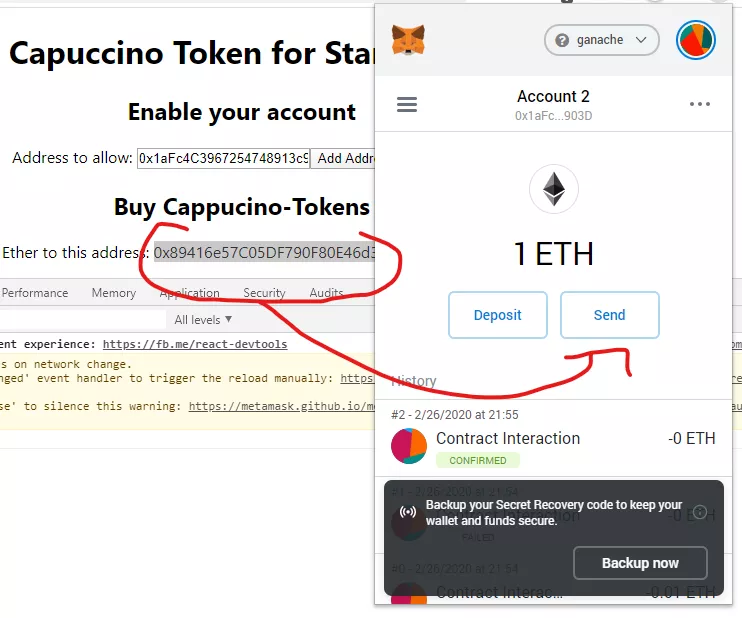
First, we have to send Wei (or Ether) to the right address. Let's display the address inside the UI.
render() {
    if (!this.state.loaded) {
      return <div>Loading Web3, accounts, and contract...</div>;
    }
    return (
      <div className="App">
        <h1>Capuccino Token for StarDucks</h1>

        <h2>Enable your account</h2>
        Address to allow: <input type="text" name="kycAddress" value={this.state.kycAddress} onChange={this.handleInputChange} />
        <button type="button" onClick={this.handleKycSubmit}>Add Address to Whitelist</button>
        <h2>Buy Cappucino-Tokens</h2>
        <p>Send Ether to this address: {this.state.tokenSaleAddress}</p>
      </div>
    );
  }
And also add the variable to the state:
class App extends Component {
  state = { loaded: false, kycAddress: "0x123", tokenSaleAddress: "" };

  componentDidMount = async () => {
And in componentDidMount write the tokenSaleAddress:
 this.kycContract = new this.web3.eth.Contract(
          KycContract.abi,
          KycContract.networks[this.networkId] && KycContract.networks[this.networkId].address,
        );

        // Set web3, accounts, and contract to the state, and then proceed with an
        // example of interacting with the contract's methods.
        this.setState({ loaded:true, tokenSaleAddress: this.myTokenSale._address });
    } catch (error) {
Then simply send 1 Wei from your account. Initially, we set 1 Wei equals 1 Token, we might want to change that later on, but for testing it's okay:
 1 Ether = 10^18 Wei, so 1 Wei = 0.000000000000000001 Ether. A tool I use to convert is Eth Converter
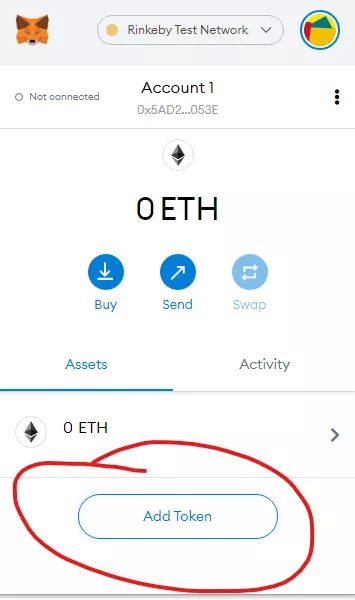
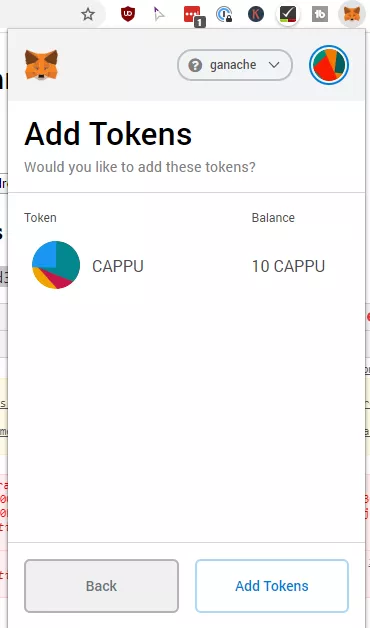
How to Display the Tokens within MetaMask?
We need to open MetaMask and add a custom Token to our UI. Follow the following pictures to add the Token:
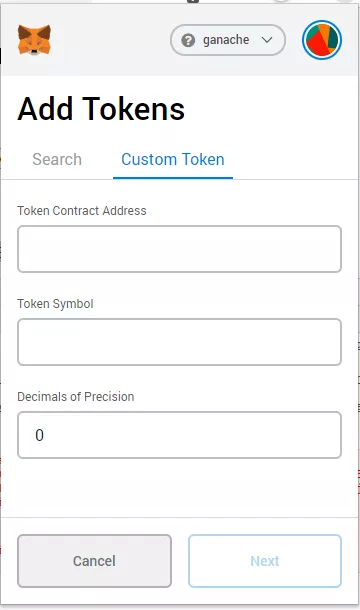
You need the Token-Address, not the TokenSaleAddress. You can either print the address to the UI or copy it directly from the json file in the client/contracts/MyToken.json file.
Add in the Token-Address from the Token and the Symbol "CAPPU", then click next. You should see you token appear in MetaMask for your account:

You could also send one CAPPU token to your other account, directly through MetaMask!
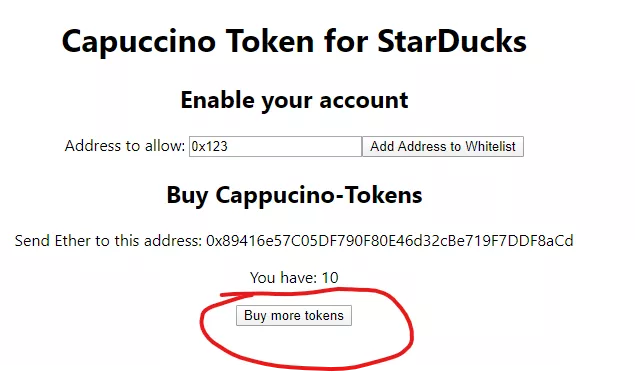
How to Buy and Display the Tokens Amount on the Website
Let's also add in the Tokens amount on the website, as well as a method to buy directly tokens via the website, without calculating yourself how much you want to buy.
render() {
if (!this.state.loaded) {
return <div>Loading Web3, accounts, and contract...</div>;
}
return (
<div className="App">
<h1>Capuccino Token for StarDucks</h1>
<h2>Enable your account</h2>
Address to allow: <input type="text" name="kycAddress" value={this.state.kycAddress} onChange={this.handleInputChange} />
<button type="button" onClick={this.handleKycSubmit}>Add Address to Whitelist</button>
<h2>Buy Cappucino-Tokens</h2>
<p>Send Ether to this address: {this.state.tokenSaleAddress}</p>
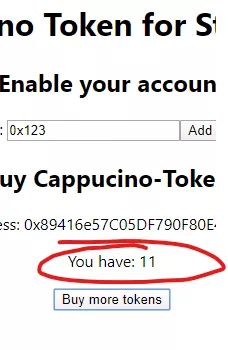
<p>You have: {this.state.userTokens}</p>
<button type="button" onClick={this.handleBuyToken}>Buy more tokens</button>
</div>
);
}
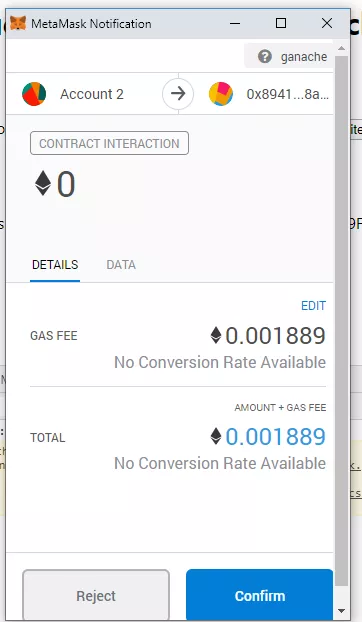
Then add in first the function to handleBuyToken:
handleBuyToken = async () => {
    await this.myTokenSale.methods.buyTokens(this.accounts[0]).send({from: this.accounts[0], value: 1});
  }
And also update the userTokens...
Add the state:
state = { loaded: false, kycAddress: "0x123", tokenSaleAddress: "", userTokens: 0 };
And add both, a function to update the userTokens, as well as an event-listener that updates the variable upon purchase:
updateUserTokens = async() => {
    let userTokens = await this.myToken.methods.balanceOf(this.accounts[0]).call();
    this.setState({userTokens: userTokens});
  }

  listenToTokenTransfer = async() => {
    this.myToken.events.Transfer({to: this.accounts[0]}).on("data", this.updateUserTokens);
  }
The last step is to call these functions at the appropriate place in the code. Add/Change this in the componentDidMount function:
        this.kycContract = new this.web3.eth.Contract(
          KycContract.abi,
          KycContract.networks[this.networkId] && KycContract.networks[this.networkId].address,
        );

        // Set web3, accounts, and contract to the state, and then proceed with an
        // example of interacting with the contract's methods.
        this.listenToTokenTransfer();
        this.setState({ loaded:true, tokenSaleAddress: this.myTokenSale._address }, this.updateUserTokens);
    } catch (error) {
      // Catch any errors for any of the above operations.
      alert(
        `Failed to load web3, accounts, or contract. Check console for details.`,
      );
      console.error(error);
    }
Let's give it a try: