Solidity Mappings

Smart Contract
We have to start with something, so we're going to start with the simplest of all examples possible. A simple mapping.
Create a new file in Remix and put in the following content:
//SPDX-License-Identifier: MIT

pragma solidity ^0.8.14;

contract SimpleMappingExample {

    mapping(uint => bool) public myMapping;
    mapping(address => bool) public myAddressMapping;

    function setValue(uint _index) public {
        myMapping[_index] = true;
    }

    function setMyAddressToTrue() public {
        myAddressMapping[msg.sender] = true;
    }


}

Run the Smart Contract
Mapping are an interesting datatype in Solidity. They are accessed like arrays, but they have one major advantage: All key/value pairs are initialized with their default value.
If you have a look at the example Smart Contract, you'll see that we have two mappings.
One, that maps uint256 to booleans, that's called myMapping.
Another one that maps addresses to booleans, that we called myAddressMapping.
We can access a mapping with the brackets []. If we want to access the key "123" in our myMapping, then we'd simply write myMapping[123].
Our mappings here are public, so Solidity will automatically generate a getter-function for us. That means, if we deploy the Smart Contract, we will automatically have a function that looks technically like this:
function myMapping(uint index) returns (bool) {
    return myMapping[index];
}
We don't need to explicitly write the function. Also not for myAddressMapping. Since both are public variables, Solditiy will add these auto_magic_ally.
Let's run the Smart Contract and see what happens!
Head over to the "Deploy and Run Transactions" Plugin and run the Smart Contract:

Perfect, let's read and write to the uint => bool mapping myMapping first.
Access Mapping Variables
Mappings are accessed like arrays, but there are no index-out-of-bounds-exceptions. If you don't know what that means, don't worry, it was a joke for Java Developers.
All possible key/value pairs are already initialized. You can simply access any key and get back "false", since that's the default boolean value.
Give it a try?
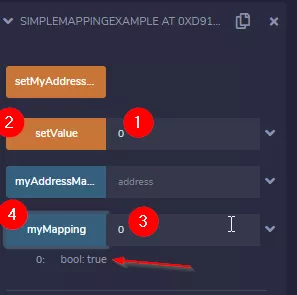
Enter "0" next to "myMapping" and hit the button. It will return false.

The same happens with "1", "2", or "123123123123123". Any index will return false, because we didn't write a value there yet.

Write to a uint => bool Mapping
If you have a look at our simple function setValue(uint _index), then you will see you will write "true" to an _index. So, if the _index = 0, then myMapping[0] will be set to true. Again, no need to initialize anything here, it will just assign the value.
Give it a try!
- Set the value of myMapping[0] to true, by entering "0" next to the "setValue" button
- Hit the setValue button
- retrieve the myMapping[0] value again, by entering "0" next to the "myMapping" button
- It should return true ✨
Address Keys in Mappings
If you come from the traditional Development world, then integer keys are nothing particularly interesting probably. It's very much like using an array or a hash map or something similar.
Internal Storage of Mappings
Here's a little advanced detour to how mappings and arrays are stored internally in the EVM.
Array data is located starting at keccak256(p) and it is laid out in the same way as statically-sized array data would: One element after the other, potentially sharing storage slots if the elements are not longer than 16 bytes. Dynamic arrays of dynamic arrays apply this rule recursively.
The value corresponding to a mapping key k is located at keccak256(h(k) . p) where . is concatenation and h is a function that is applied to the key depending on its type:
- for value types, h pads the value to 32 bytes in the same way as when storing the value in memory.
- for strings and byte arrays, h computes the keccak256 hash of the unpadded data.
Find more information here on the Solidity page: https://docs.soliditylang.org/en/v0.8.3/internals/layout_in_storage.html?highlight=storage#mappings-and-dynamic-arrays
Addresses are a cool thing in Solidity. They are like a bank account number, an IBAN if you wish. You know who transacts with your Smart Contract and the Smart Contract knows who you are.
The cool thing is, addresses can be keys for arrays and mappings. And in our example we map addresses to boolean values. We could use this for white-listing for example. So, if an address is allowed to do a certain action in our Smart Contract then we can white-list it.
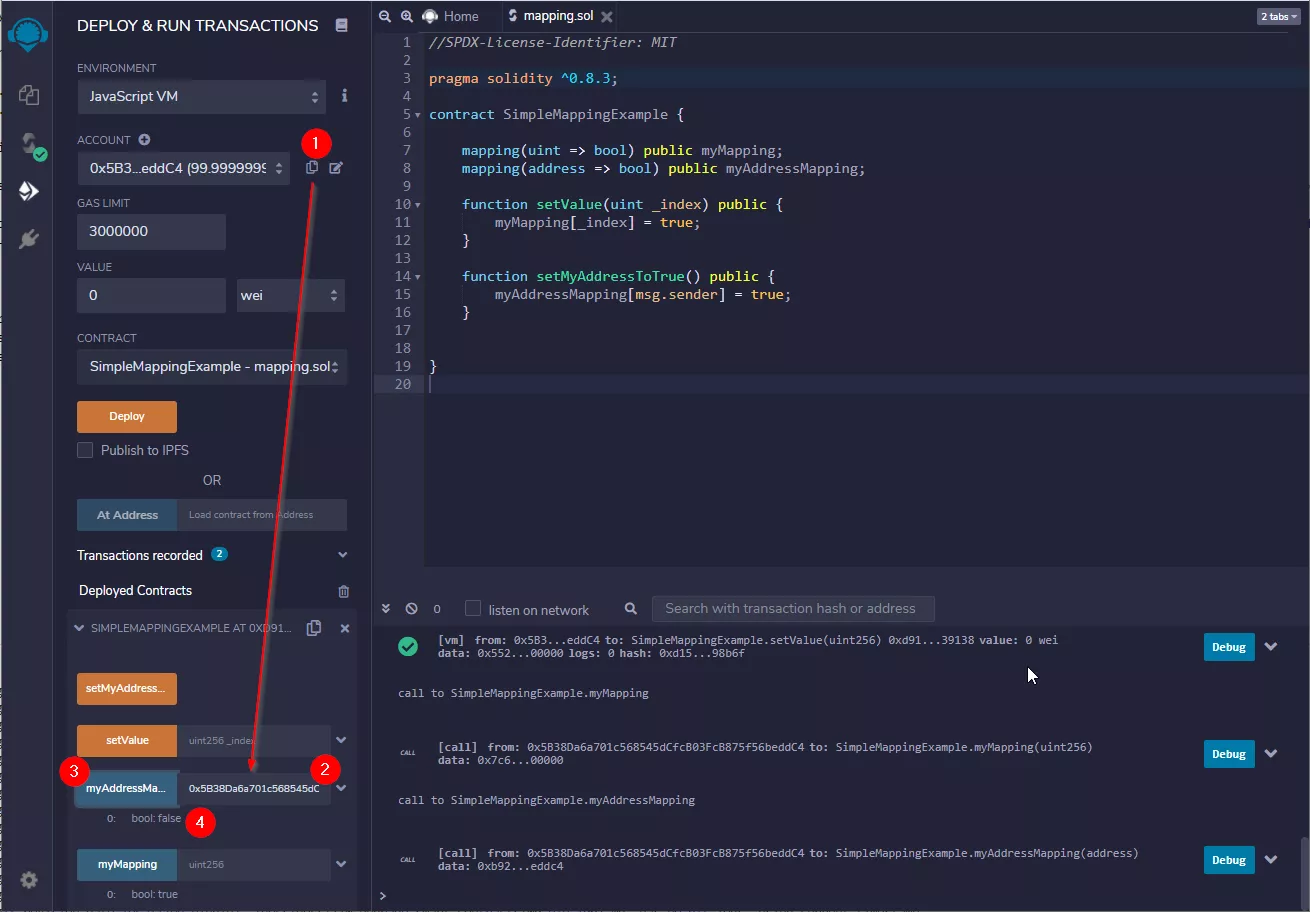
Let's see how that behaves. First, let's check the value for your own address:
- Copy the Address from the Dropdown - there is a little copy icon next to the dropdown, press it
- Paste the Address into the input field next to "myAddressMapping"
- Press the Button
- The value should be "false"
Set Address Keys in a Mapping
Let's have a closer look at the function setMyAddressToTrue:
    function setMyAddressToTrue() public {
        myAddressMapping[msg.sender] = true;
    }
This function does several things:
- it accesses the global msg-object and gets the senders address. So, if you are interacting with a specific address, then for the Smart Contract that address will be in
msg.sender - It accesses the
myAddressMappingmapping and sets the value "true" for the current address.
Let's give it a try!
- simply click the "setMyAddressToTrue" button. There is no input field, because the address will automatically be the one you use to interact with the Smart Contract
- Retrieve the value again
- It should be true

Mappings of mappings
Because of the way mappings are stored within the EVM, it's possible to create mappings of mappings as well. For example:
mapping (uint => mapping(uint => bool)) uintUintBoolMapping;
Let's try a little coding exercise to get a feeling for mappings yourself!
Code Exercise
Try to use the mapping above, which is not public, and create both a getter and a setter function for it.
In case you get stuck, you can see the solution below.
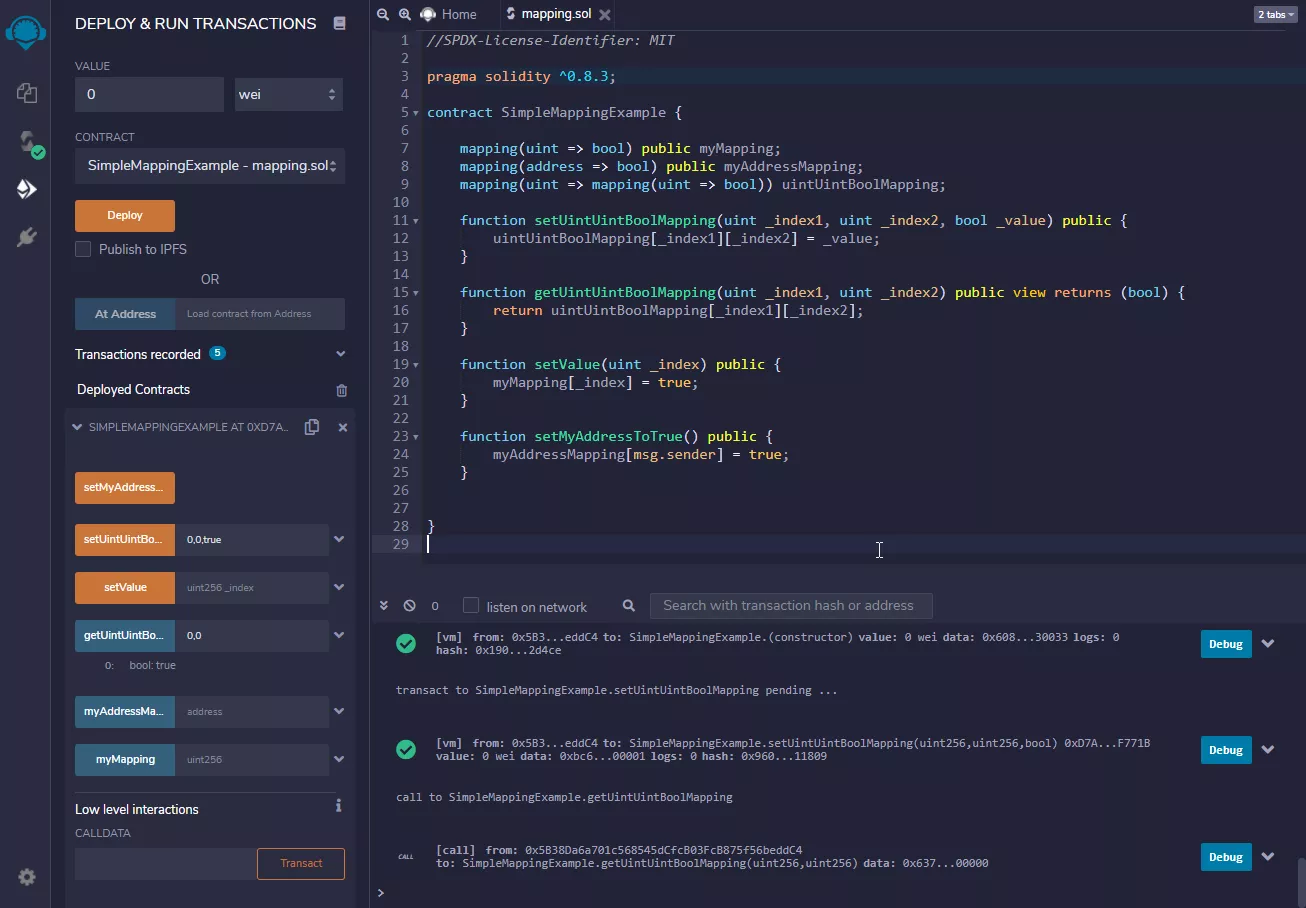
Solution Code Exercise
    mapping(uint => mapping(uint => bool)) uintUintBoolMapping;

    function setUintUintBoolMapping(uint _index1, uint _index2, bool _value) public {
        uintUintBoolMapping[_index1][_index2] = _value;
    }

    function getUintUintBoolMapping(uint _index1, uint _index2) public view returns (bool) {
        return uintUintBoolMapping[_index1][_index2];
    }
You might have seen, you can't name the getter function with the same name as the variable. But if you are making the variable public, then Solidity automatically creates a getter function with the same name as the variable. Peculiar detail to keep in mind here.
Alright, that's it for this lab. Congratulations, you created your first mapping and know how to access mappings.
Smart Contract Security Through Mappings
Let's create a Smart Contract we start with again. It's slightly different than in the previous Lab, because I actually want to do something with it. By the end of the lab we have some sort of Payment Smart Contract can keep track of deposits and withdrawals in an easy way using mappings and structs.#
Create the following file in Remix:
//SPDX-License-Identifier: MIT

pragma solidity ^0.8.14;

contract MappingsStructExample {

    function getBalance() public view returns(uint) {
        return address(this).balance;
    }

    function sendMoney() public payable {

    }

    function withdrawAllMoney(address payable _to) public {
        _to.transfer(address(this).balance);
    }
}
The Smart Contract is very simplistic. It allows everyone to send Ether to the Smart Contract. But it also allows everyone to transfer all funds from the Smart Contract to any address. Not very secure - yet.

Let's play around with this Smart Contract and see how it works with depositing and withdrawing money, and how we can make it more secure.
Understand the Limitations
In this step we basically execute the Smart Contract and see how it behaves, before we improve the Smart Contract with mapping and structs.
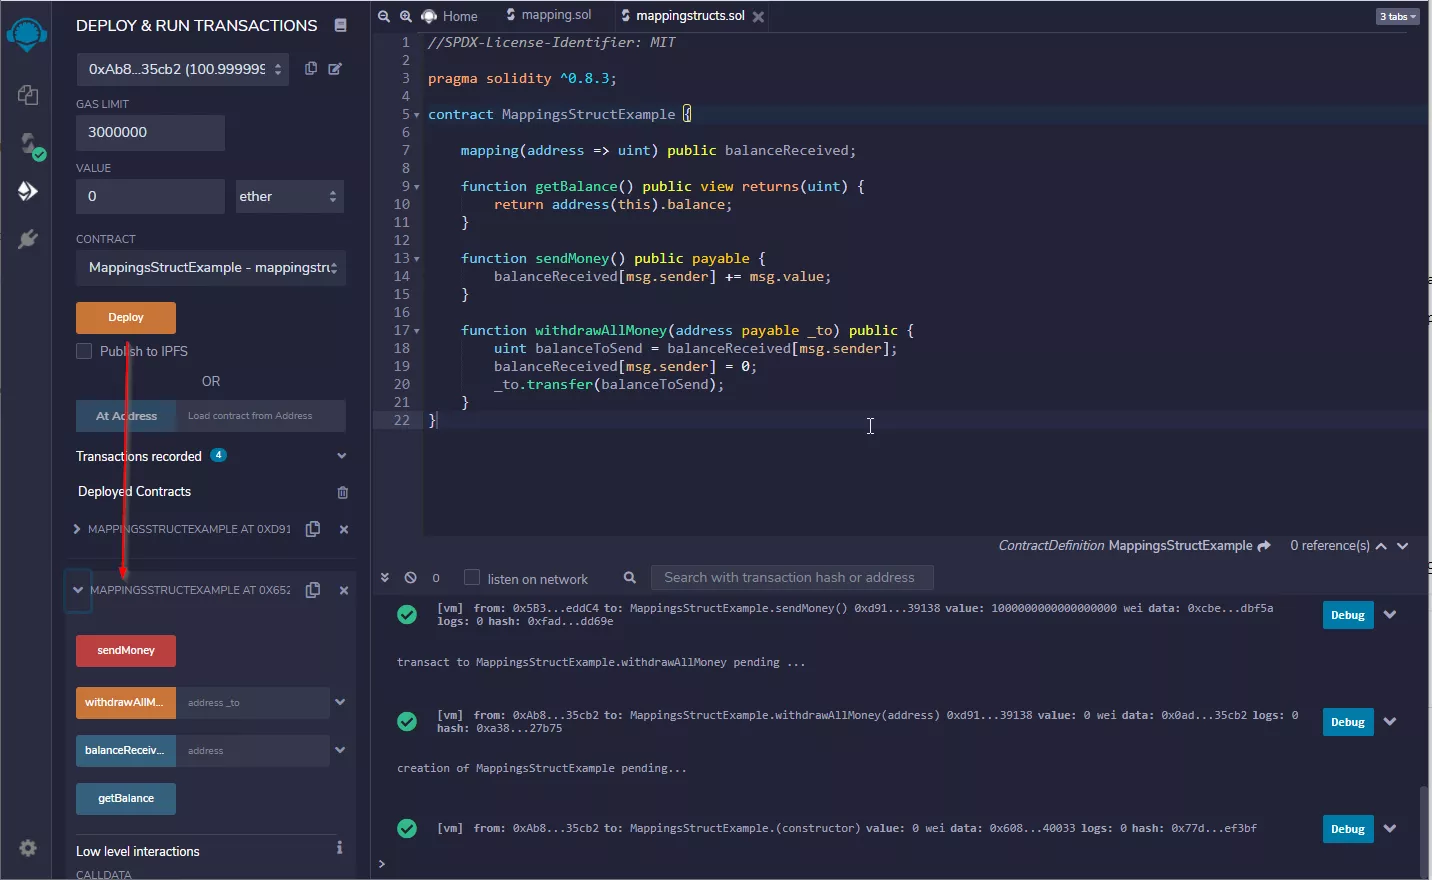
Deploy the Smart Contract
Head over to the "Deploy & Run Transactions" Plugin and Deploy the Smart Contract
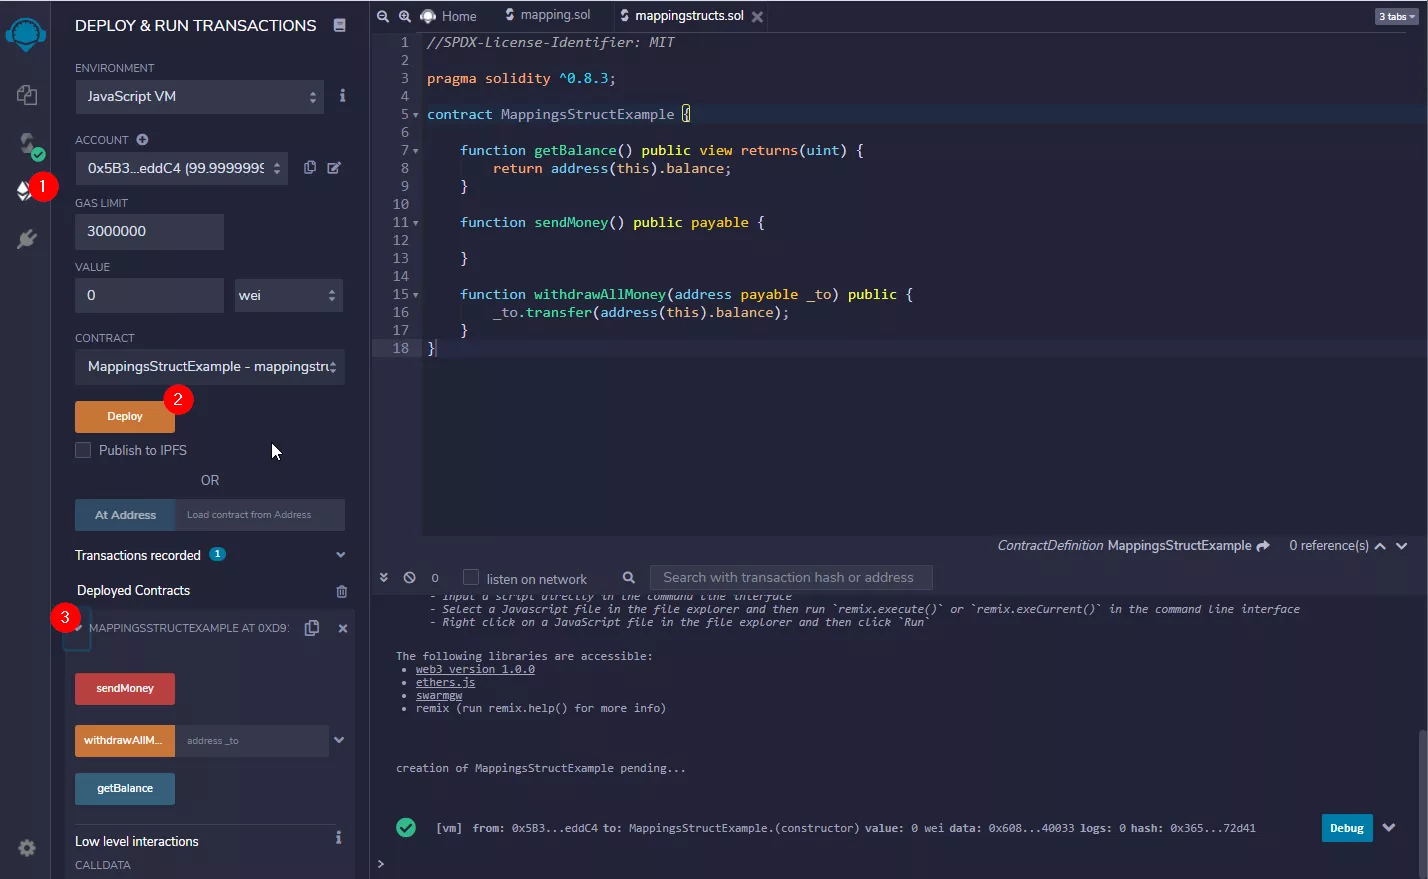
Now you should have your Smart Contract deployed and an instance under "Deployed Contracts"
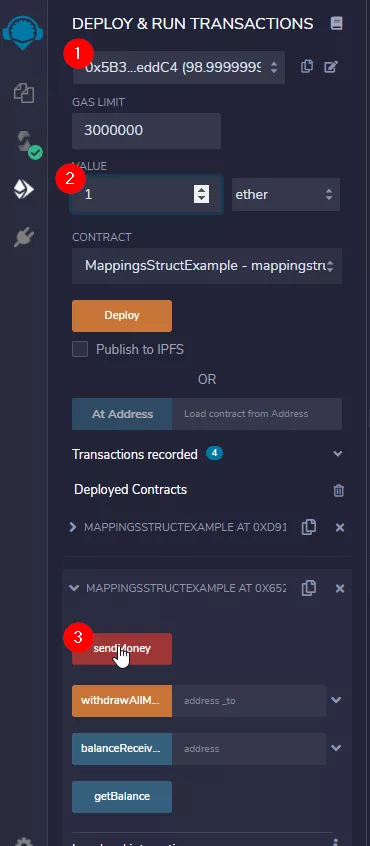
Deposit some Funds
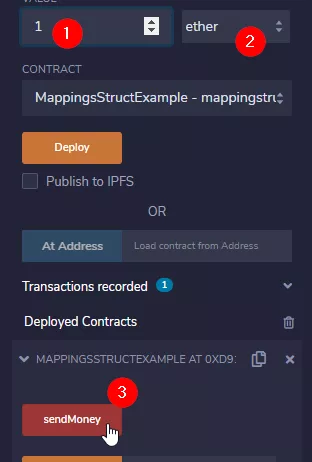
Let's send some Ether to the Smart Contract. The Contract will manage its own funds.
- Enter "1" in the value field
- Select "Ether" from the Dropdown
- Hit the "sendMoney" Button
Withdraw Money
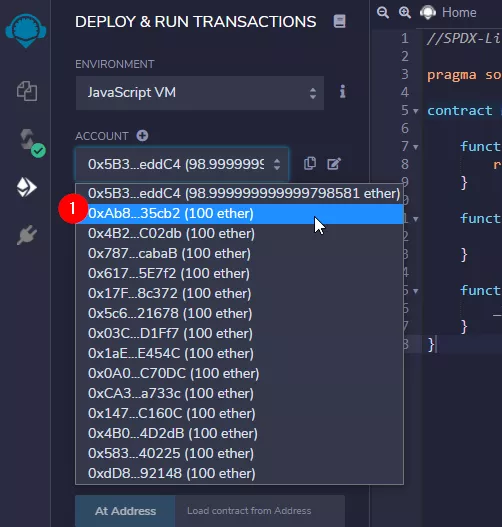
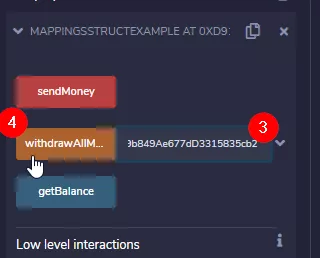
Our Smart Contract is extremely simple at this stage. It allows everyone to send money to the Smart Contract. It also allows everyone to withdraw everything. That's not very good obviously, unless you operate some sort of charity. Let's give it a try. Let's withdraw all money to our second account using our second account:
- Select Account#2 from the Accounts Dropdown
- Copy the Address
- Paste the Address next to "withdrawAllMoney"
- hit the "withdrawAllMoney" Button
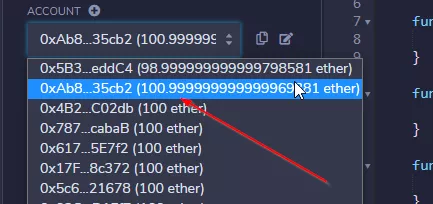
- Observe the increased Ether Amount for that Account

So, everyone can do everything with the Smart Contract. Let's make it a bit more secure!
Try yourself first
Want to give it a try yourself first before you proceed?
Extend the Smart Contract and use a Mapping to track who send how much to the Smart Contract.
Then only allow withdrawals for the amount deposited.
So, if address 0x123... deposits 1 Ether, then address 0x123... can withdraw 1 Ether again. Nobody else. And not more.
Use a mapping(address => uint) for this and track the funds with msg.value.
Add a Mapping to track Deposits
Let's make our Smart Contract inherently secure. We will allow only withdrawals for previously done deposits. It's the first step towards understanding Token Contracts, which you will see later!
Add the following things to the Smart Contract:
//SPDX-License-Identifier: MIT

pragma solidity ^0.8.14;

contract MappingsStructExample {

    mapping(address => uint) public balanceReceived;

    function getBalance() public view returns(uint) {
        return address(this).balance;
    }

    function sendMoney() public payable {
        balanceReceived[msg.sender] += msg.value;
    }

    function withdrawAllMoney(address payable _to) public {
        uint balanceToSend = balanceReceived[msg.sender];
        balanceReceived[msg.sender] = 0;
        _to.transfer(balanceToSend);
    }
}
To understand what's going on here:
When someone sends money using the "sendMoney" function, we track the msg.value (amount in Wei) with the balanceReceived mapping for the person who interacted with the Smart Contract.
If that same person tries to withdraw money again using "withdrawAllMoney", we look in that mapping how much he sent there previously, then reset the mapping and send the amount.
Re-Entrancy and Checks-Effects-Interaction Pattern
You are eventually wondering why we don't do the following:
function withdrawAllMoney(address payable _to) public {
    _to.transfer(balanceReceived[msg.sender]);
    balanceReceived[msg.sender] = 0;
}
This follows the so-called Checks-Effects-Interaction pattern. As a rule of thumb: You interact with outside addresses last, no matter what. Unless you have a trusted source. So, first set your Variables to the state you want, as if someone could call back to the Smart Contract before you can execute the next line after .transfer(...). Read more about this here: https://fravoll.github.io/solidity-patterns/checks_effects_interactions.html
Deploy the new Smart Contract
Head over to the "Deploy & Run Transactions" Plugin and deploy a new Instance.
Deposit and Withdraw
We will deposit 1 Ether from two different accounts and then withdraw Ether again:
- select Account#1 from the Accounts Dropdown
- Value: 1 Ether
- Hit the "sendMoney" button
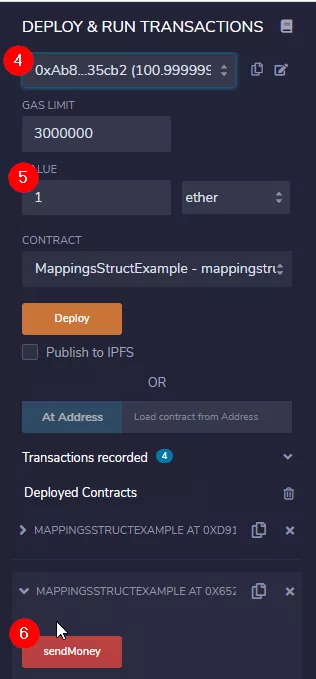
- Select Account#2 from the Accounts Dropdown
- Value: 1 Ether
- Hit the "sendMoney" button
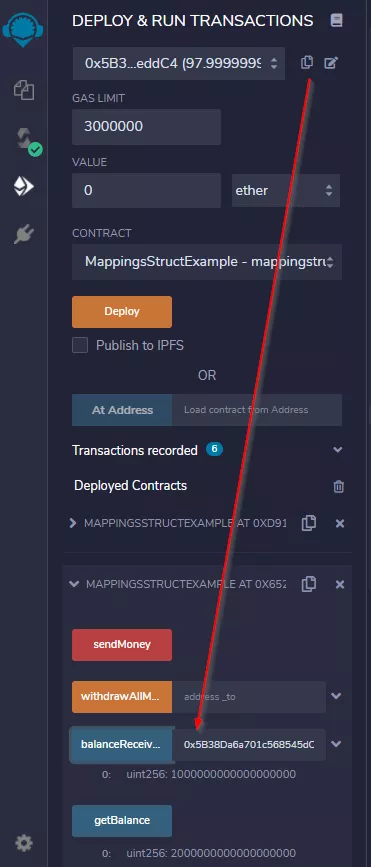
Now check the Balance of the Smart Contract:
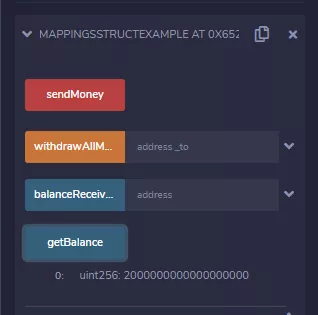
You have 2 Ether (2 * 10^18 Wei) in the Smart Contract. But if you check the accounts individual amount from the mapping, then you see that each account can max withdraw 1 Ether:
Withdraw all Money to Account#3
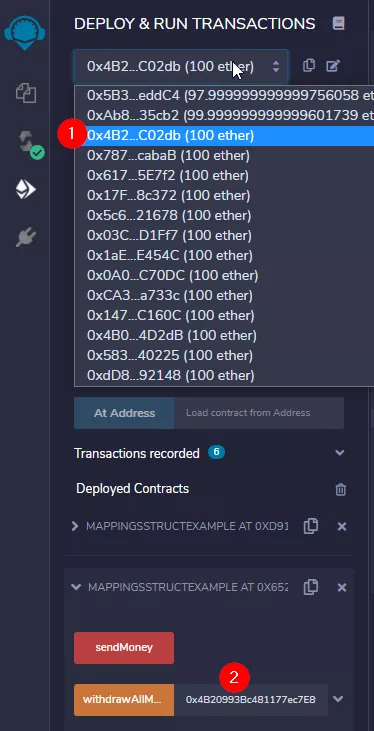
Let's withdraw all the funds stored in the Smart Contract to Account#3 from the Accounts Dropdown:
- Copy the address of Account#3 (select Account#3, copy)
- Paste the Address into the withdrawAllMoney input field, but don't hit the button yet
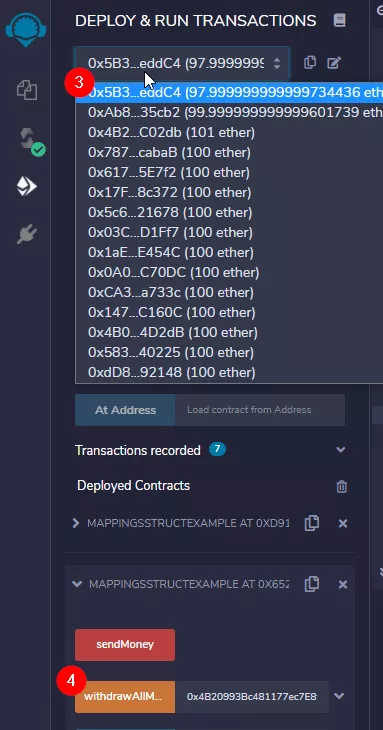
- Go back to Account#1
- Hit the "withdrawAllMoney" button with Account#3-Address in the input field
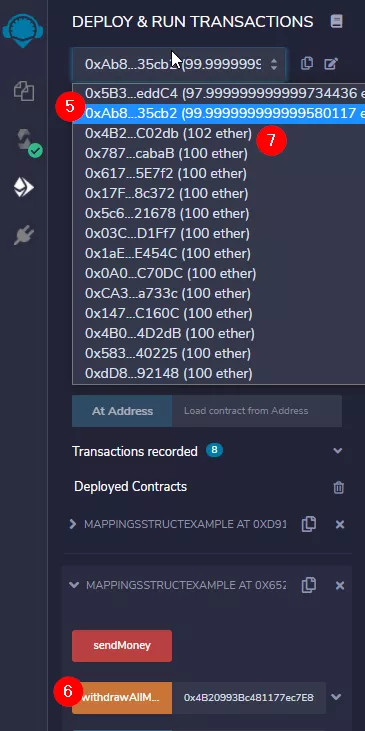
- Select Account#2 from the Accounts Dropdown
- Hit the "withdrawAllMoney" button again with Account#3-Address in the input field
- Check the Balance of the Smart Contract and of Account#3

Withdrawing all money is fun, but not very useful yet. Let's add another functionality to withdraw partial funds.
Try yourself first
Want to give it a try yourself first before you proceed?
Extend the Smart Contract and use the Mapping allow partial sending. That means, the user can specify an amount to send. The Smart Contract checks if the amount isn't larger than what the user previously deposited, deducts the amount from the users balance and sends it.
Add partial Withdrawals
Sending all funds is fun, but it isn't very useful. Sometimes, like with a Bank Account, you don't want to send out all the funds you have. You just want to send a little bit. We can do this quite easily with our new mapping.
Add the following things to the Smart Contract:
//SPDX-License-Identifier: MIT

pragma solidity ^0.8.14;

contract MappingsStructExample {

    mapping(address => uint) public balanceReceived;

    function getBalance() public view returns(uint) {
        return address(this).balance;
    }

    function sendMoney() public payable {
        balanceReceived[msg.sender] += msg.value;
    }

    function withdrawMoney(address payable _to, uint _amount) public {
        require(_amount <= balanceReceived[msg.sender], "not enough funds");
        balanceReceived[msg.sender] -= _amount;
        _to.transfer(_amount);
    }


    function withdrawAllMoney(address payable _to) public {
        uint balanceToSend = balanceReceived[msg.sender];
        balanceReceived[msg.sender] = 0;
        _to.transfer(balanceToSend);
    }
}
To understand what's going on here:
When someone withdraws funds, we check if the amount he wants to withdraw is smaller or equal than the amount he previously deposited. If yes, then we deduct the amount from his balance and send out the funds.
Deploy the new Smart Contract
Head over to the "Deploy & Run Transactions" Plugin and deploy a new Instance.

Deposit and Withdraw 50%
We will deposit 1 Ether from Account#1 and Withdraw 50% to Account#3. I won't provide Screenshots for the first few steps, since it's exactly the same as previously:
- select Account#1 from the Accounts Dropdown
- Value: 1 Ether
- Hit the "sendMoney" button
- Select Account#3 from the Accounts Dropdown
- Copy the Address And Paste it in the "withdrawMoney" Input field
- Add "500000000000000000" as amount
- Switch back to Account#1 and hit the "withdrawMoney" button.
- Check the Balance of "Account#3"
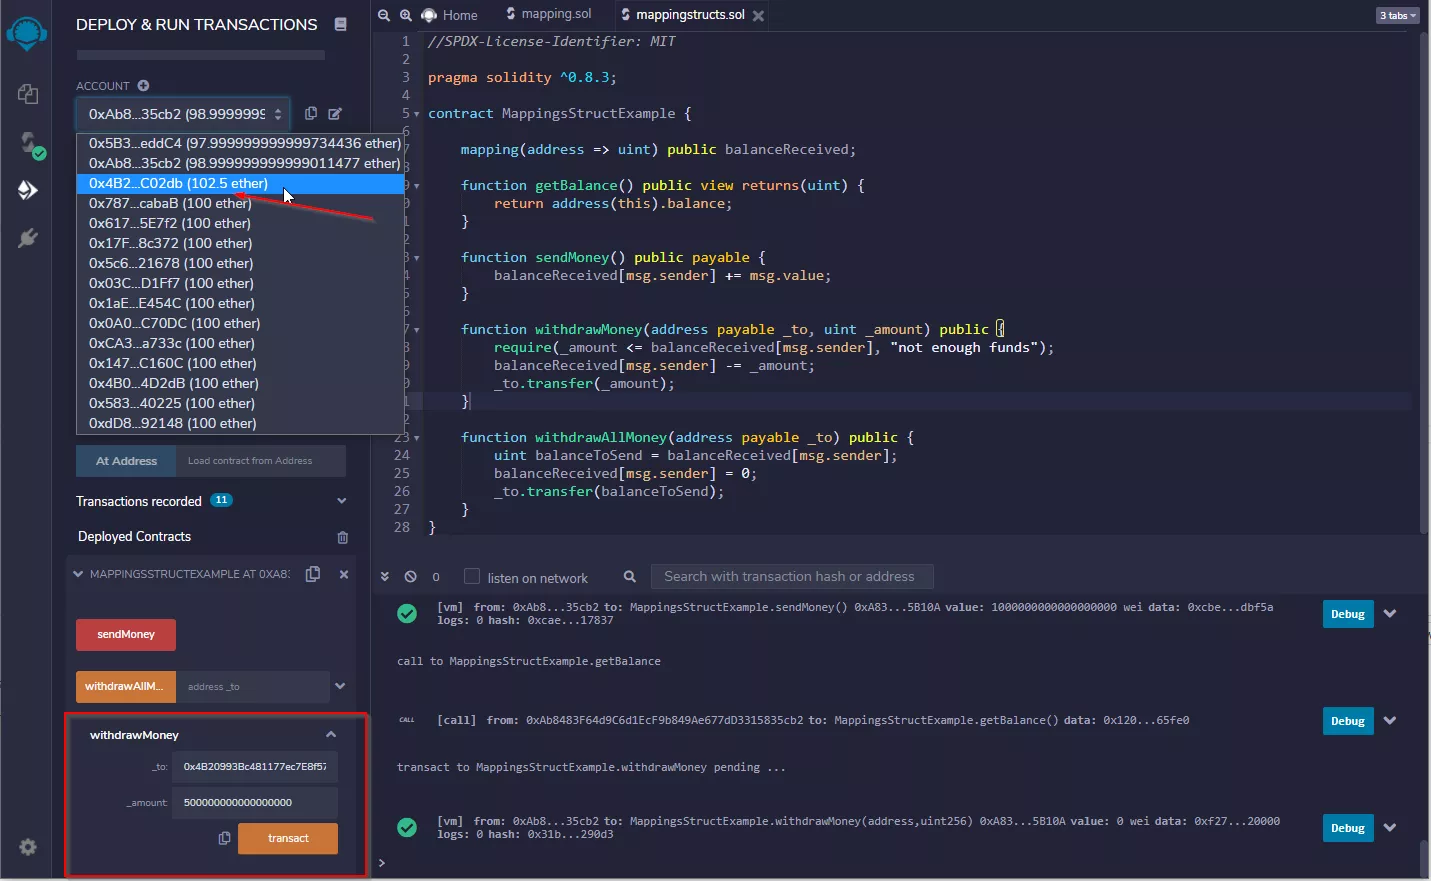
If you are wondering why my input fields look like in the picture: There is a little down-arrow next to the input fields, so it will open an extended view.
If you followed along in this lab, then you have 102.5 Ether (102.5 * 10^18 Wei) in the Account#3. If you just started with this step, then you have 100.5 Ether in Account#3.
Now, that's all good so far. Let's add another level of complexity to it by using Structs. We define our own Datatypes so we can track single payments from users.