Sample Smart Contract
Before we begin, let's setup a sample Smart Contract. Just enough to get something working for us to have a simplistic example.
Create a new file in Remix. I've named mine "StartingStopping.sol", but obviously, you can name your file any way you'd like.
// SPDX-License-Identifier: GPL-3.0
pragma solidity ^0.8.1;

contract StartStopUpdateExample {
    function sendMoney() public payable {

    }

    function withdrawAllMoney(address payable _to) public {
        _to.transfer(address(this).balance);
    }
}
What does it do?
We have two functions:
sendMoney(): This function can receive Ether, it's a payable function.
withdrawAllMoney(...): Very similar to our previous example, this function will automatically withdraw all available funds stored at the address of the Smart Contract to the variable in the as function argument given address. What a sentence! In other words: It sends all Ether to the "_to" address.
Deploy the Smart Contract
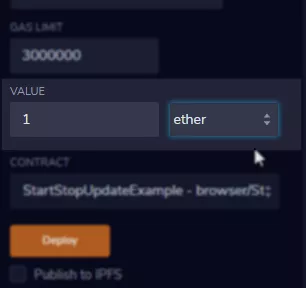
Let's deploy the Smart Contract to the "JavaScript VM" in Remix. Head over to the "Deploy & Run Transactions" Plugin and hit Deploy:

Perfect! Let's try to send some Funds around!
Use the Smart Contract
As before, we're going to:
- Send Money to the Smart Contract using Account #1
- Withdraw the Money using any other Account
Already sounds scarily unsecure. If you come from traditional backend development, you should shiver now. But worry not, we'll get to safe heavens soon!
Alright, so, start by sending some funds to the Smart Contract...
- Enter 1 Ether into the value field:
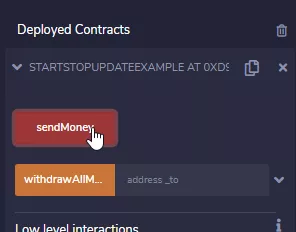
- send it to the "sendMoney" function of your Smart Contract:
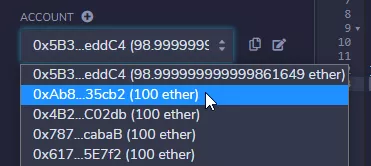
- Select the second Account in the Accounts-Dropdown:
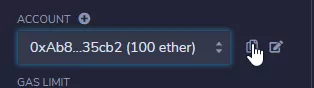
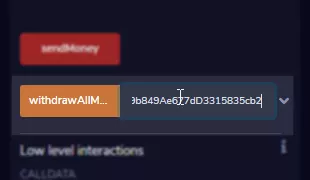
- Copy the Address:
- Paste the Address into the "withdrawAllMoney" input field:
-
Click the "withdrawAllMoney" button.
-
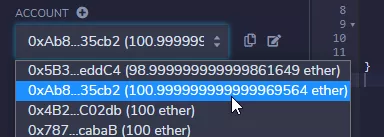
Have a look if you have >100 eth in your Account #2 of the Accounts-Dropdown:
So, just to summarize how insecure that is:
- Someone funded the Smart Contract
- But everyone can withdraw to any address of their choice?
That sounds pretty bad, right?
We can do better than that!!! In the next exercise we're going to restrict withdrawals to the person who owns the Smart Contract.
Try yourself first?
Want to give it a try yourself? Great idea!
So, here's what you need:
- A variable that stores the address of the person who deployes the Smart Contract.
-
a constructor. This get's called when the Smart Contract is deployed. It's named
constructor() {...}. Inside you set the address to the msg.sender. -
a require in the withdrawAllMoney function. We're talking about Exceptions later in the course extensively, so don't worry too much about the internal workings. Make sure that the Address that calls the withdrawAllMoney function is the same as stored in the variable that is set by the constructor.
Alright, off to the solution: next page!